Here's my story
With my dad being a mechanic I've always been into cars and it didn't have to be a domestic or an import, it just had to have an engine in it that I could fiddle around with. In my senior year in high school (the year "The Fast and The Furious" came out), I really got turned on to the import market but I really didn't know what I wanted. After graduation, my father gave me his 1989 Isuzu Impulse that needed to be rebuilt. I learned everything I know now about cars from that Impulse. After fooling around a bit with the Isuzu, I knew I was wanting something a bit more fun and it had to have an air conditioner (which my Impulse didn't). Then, I became good friends with my pal James who owns a 2005 STI. He really got me hooked on the Subaru scene and that's when my hunt for an Impreza began. At first I was wanting an STI because I saw and felt the power my friends car had, but after looking for awhile I found nothing but modded and raced out Subaru's, both WRX and STI's. Then.....while looking for an STI on autotrader, I found a nice looking Impreza RS. She was Aspen White and came with some very nice looking rims. The car was for sale in Austin, so I went for a test drive. While it didn't have the power I was wanting, it did however have the handling I loved so much and of course bone stock with no mods. The dealership wanted $16500 plus TTL and I talked them down to $15000 out the door. It was said and done and I was in the Subaru game.
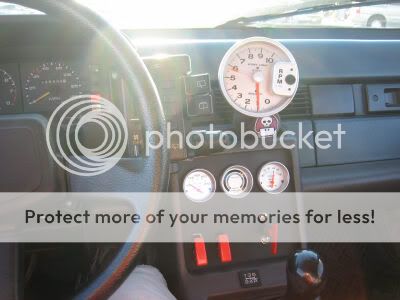
My first car: 1989 2.3 Liter Isuzu Impulse
![Image]()
![Image]()
![Image]()
![Image]()
She had over 300,000 miles on her when I sold her.
![Image]()
![Image]()
My new car: 2005 Subaru Impreza RS (What she looked like when I bought Her)
Bone stock except the Tenzo R wheels
![Image]()
![Image]()
Interior with WRX sport seats and MOMO steering wheel
![Image]()
With my dad being a mechanic I've always been into cars and it didn't have to be a domestic or an import, it just had to have an engine in it that I could fiddle around with. In my senior year in high school (the year "The Fast and The Furious" came out), I really got turned on to the import market but I really didn't know what I wanted. After graduation, my father gave me his 1989 Isuzu Impulse that needed to be rebuilt. I learned everything I know now about cars from that Impulse. After fooling around a bit with the Isuzu, I knew I was wanting something a bit more fun and it had to have an air conditioner (which my Impulse didn't). Then, I became good friends with my pal James who owns a 2005 STI. He really got me hooked on the Subaru scene and that's when my hunt for an Impreza began. At first I was wanting an STI because I saw and felt the power my friends car had, but after looking for awhile I found nothing but modded and raced out Subaru's, both WRX and STI's. Then.....while looking for an STI on autotrader, I found a nice looking Impreza RS. She was Aspen White and came with some very nice looking rims. The car was for sale in Austin, so I went for a test drive. While it didn't have the power I was wanting, it did however have the handling I loved so much and of course bone stock with no mods. The dealership wanted $16500 plus TTL and I talked them down to $15000 out the door. It was said and done and I was in the Subaru game.
My first car: 1989 2.3 Liter Isuzu Impulse

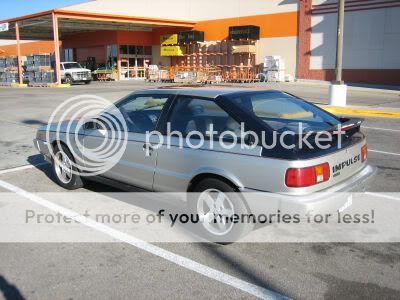

She had over 300,000 miles on her when I sold her.


My new car: 2005 Subaru Impreza RS (What she looked like when I bought Her)
Bone stock except the Tenzo R wheels


Interior with WRX sport seats and MOMO steering wheel