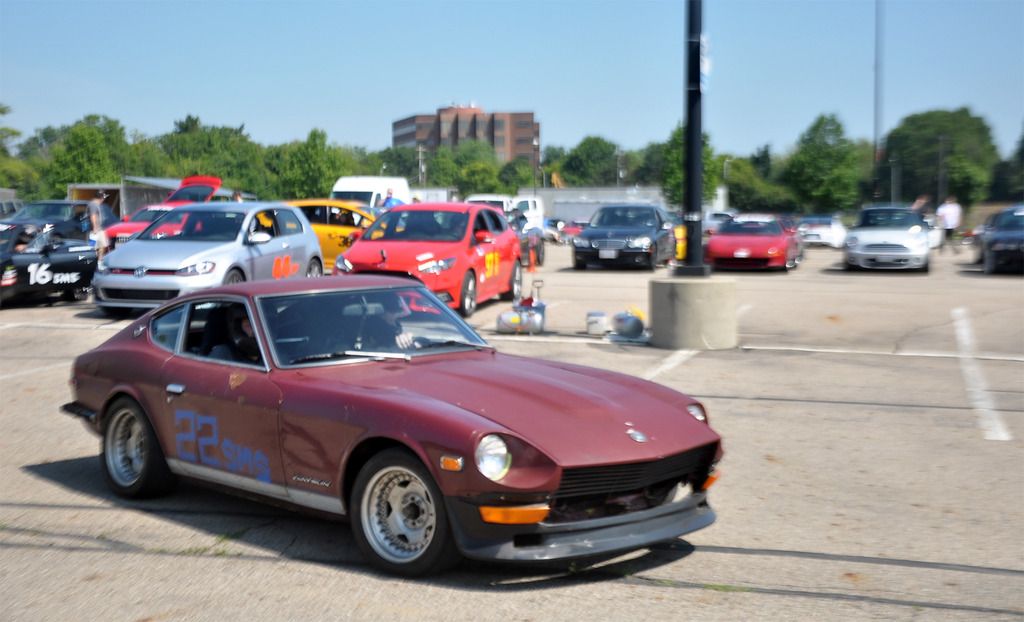
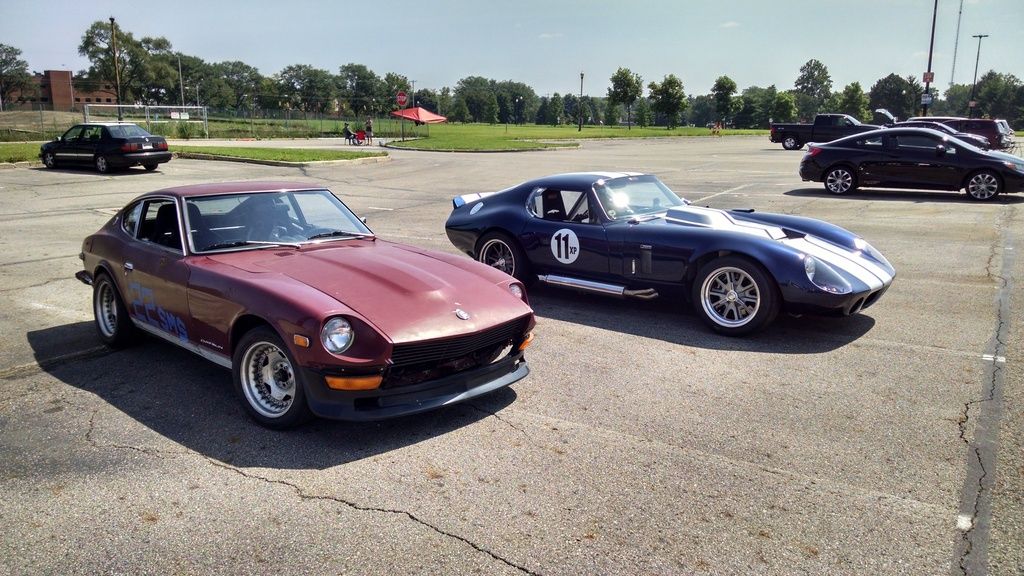
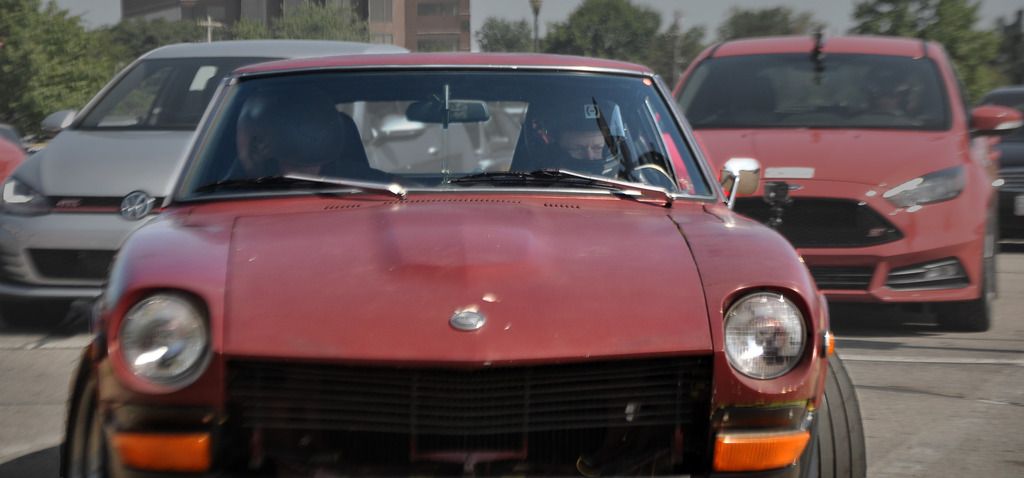
first roll - friday the 13th at midnight! - CLICK HERE
some decent pictures - CLICK HERE
2015 track prep - CLICK HERE
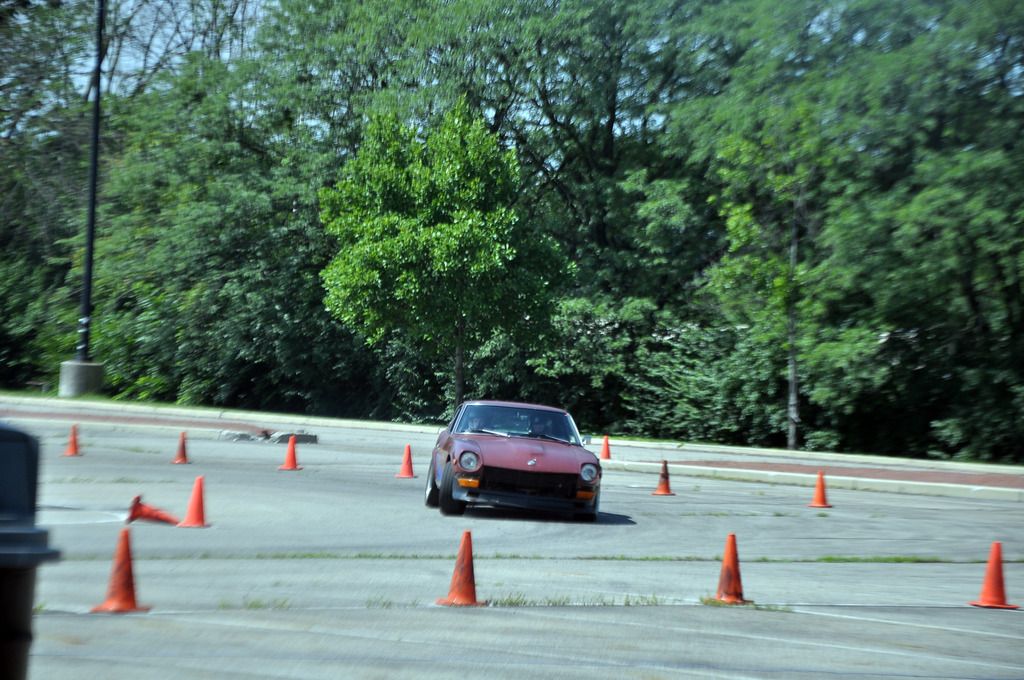
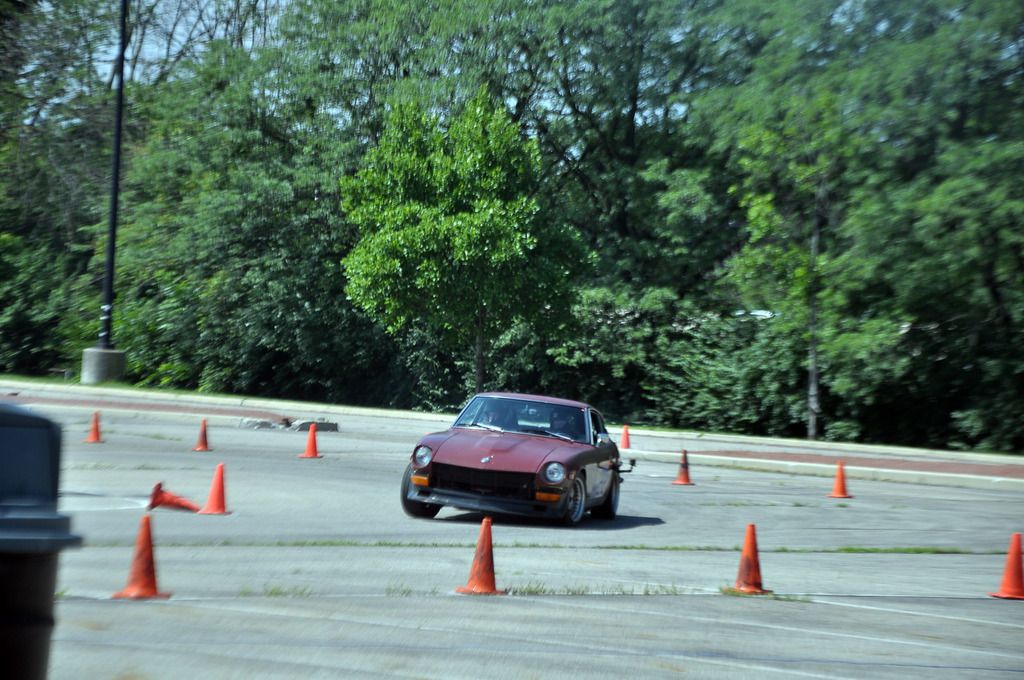
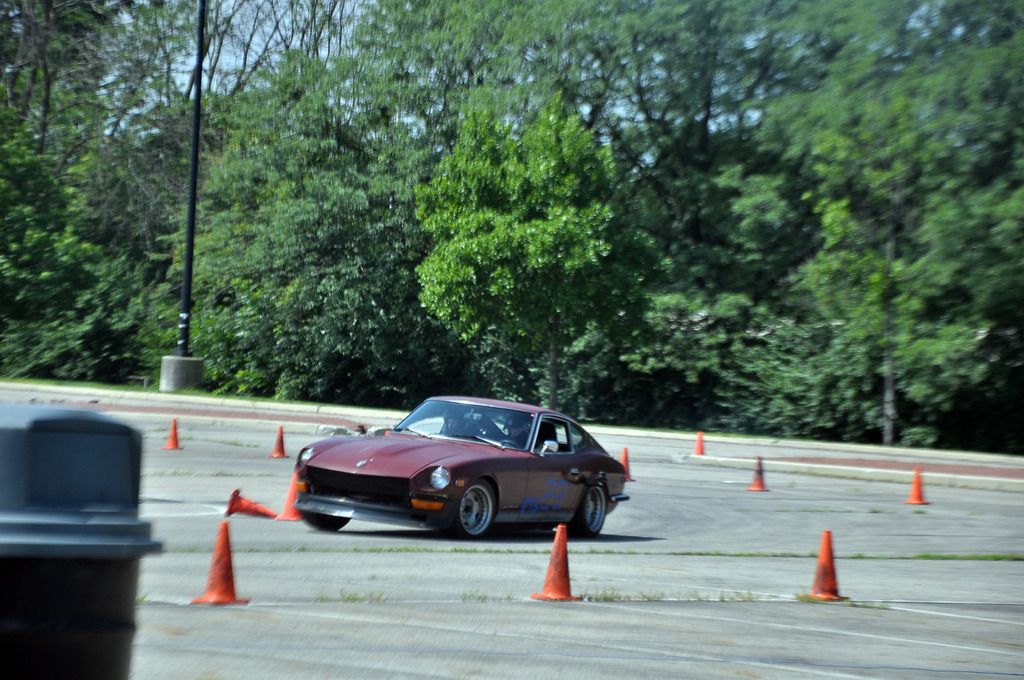
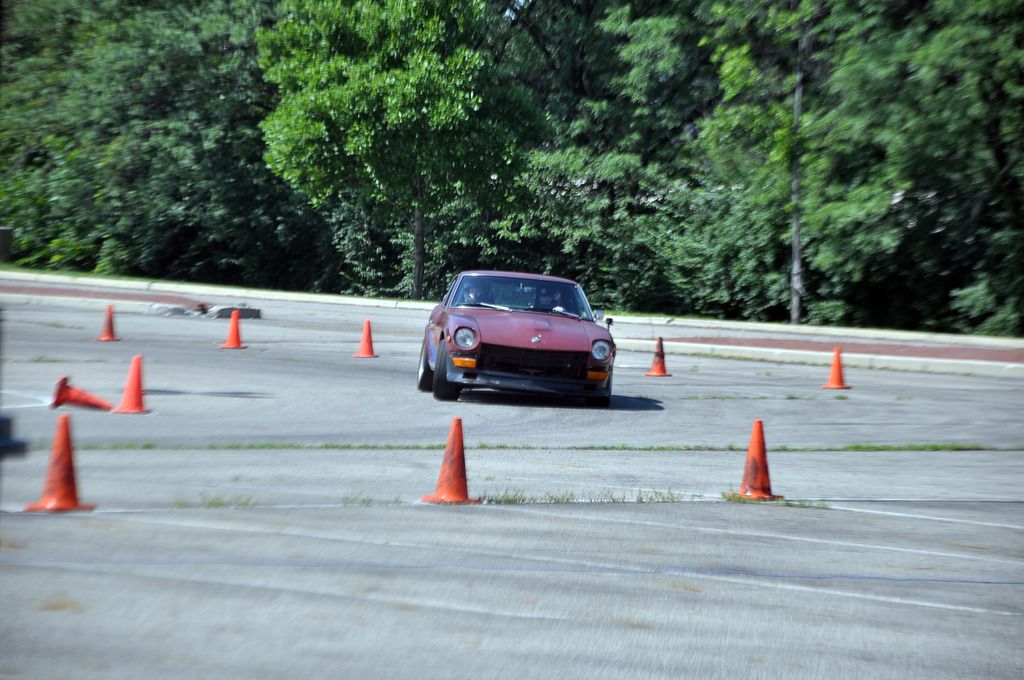
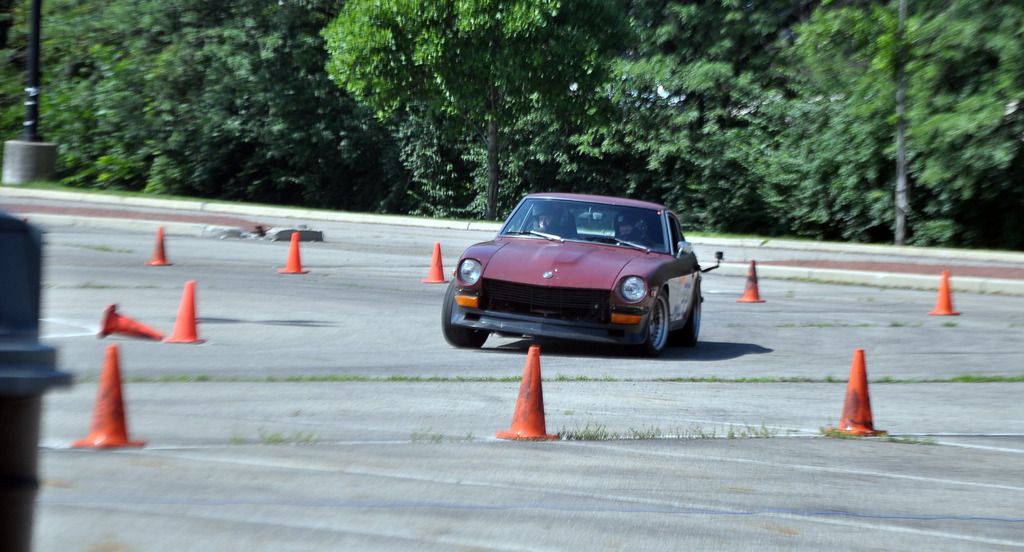
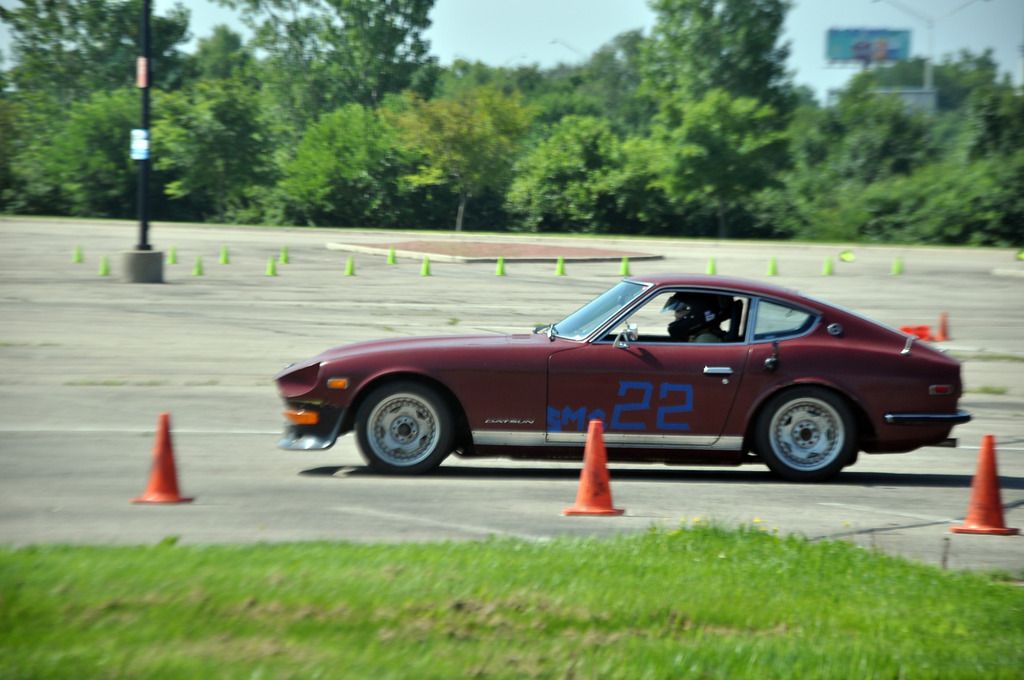
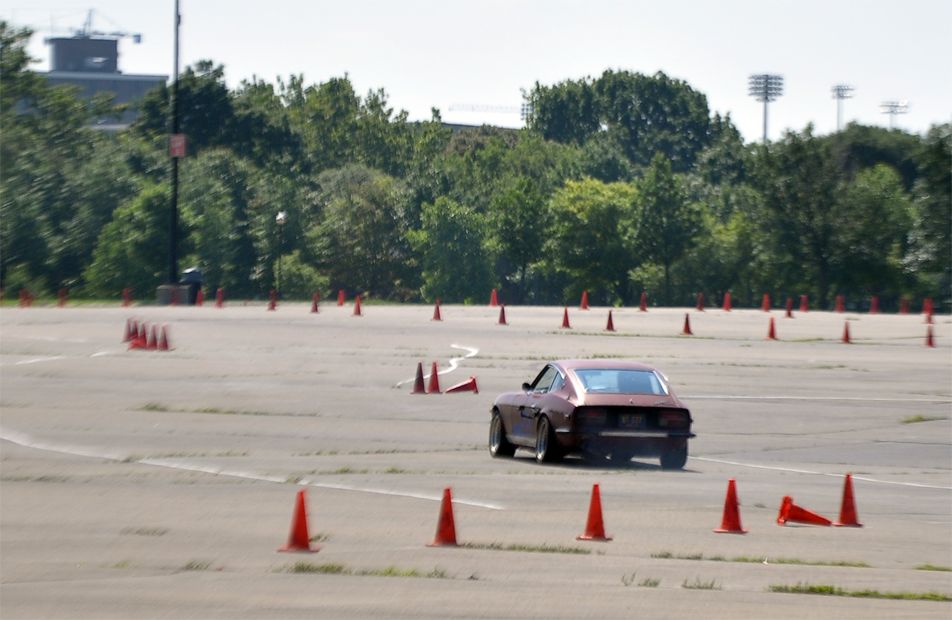
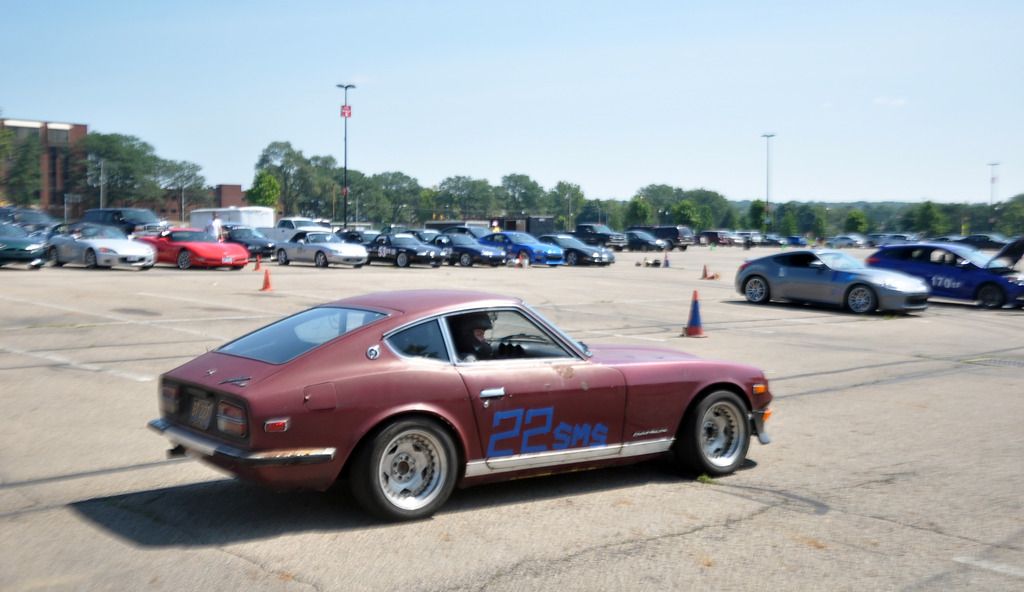
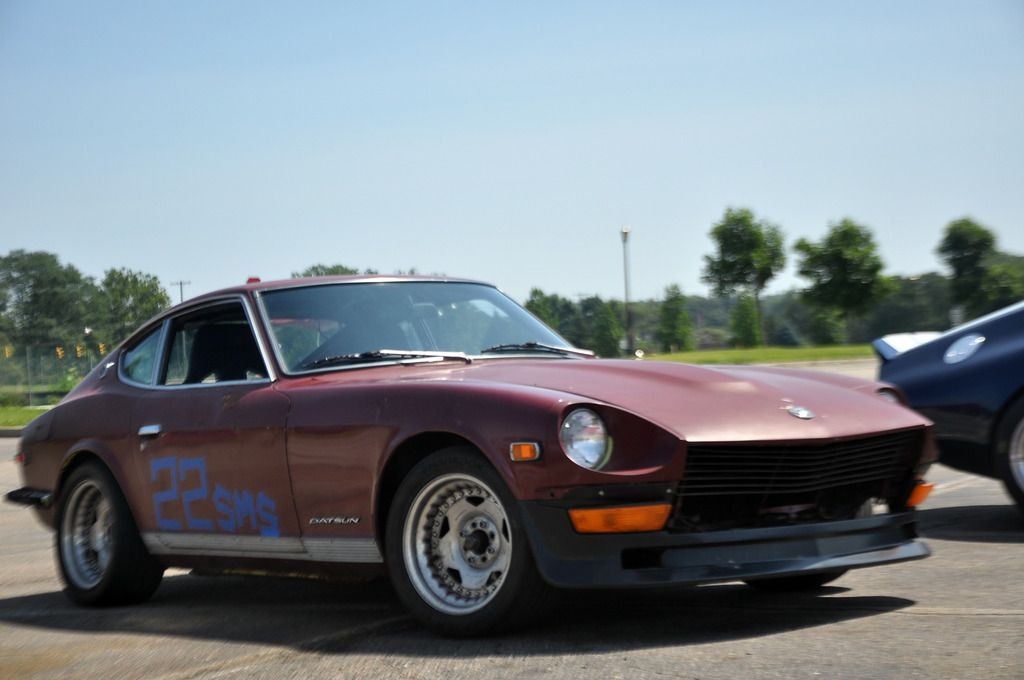
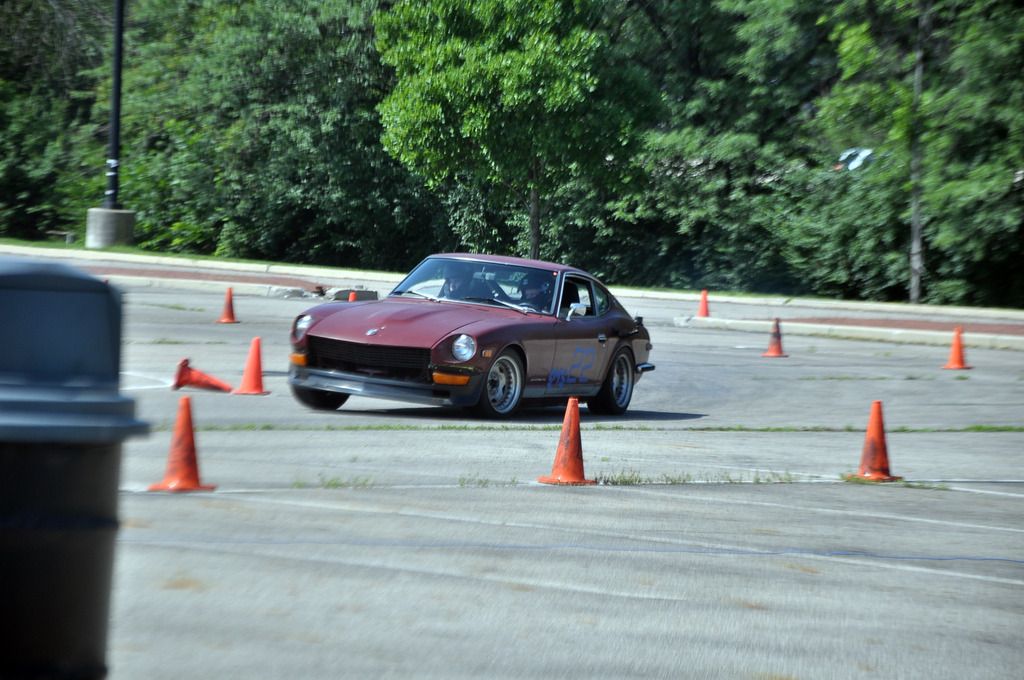
first event - SCCA SOLO/autox - CLICK HERE
proper photoshoot - CLICK HERE
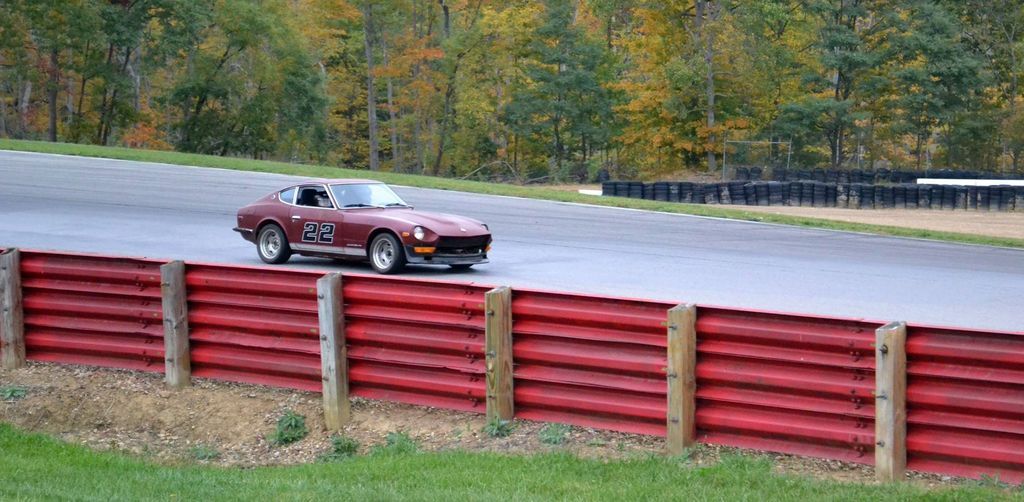
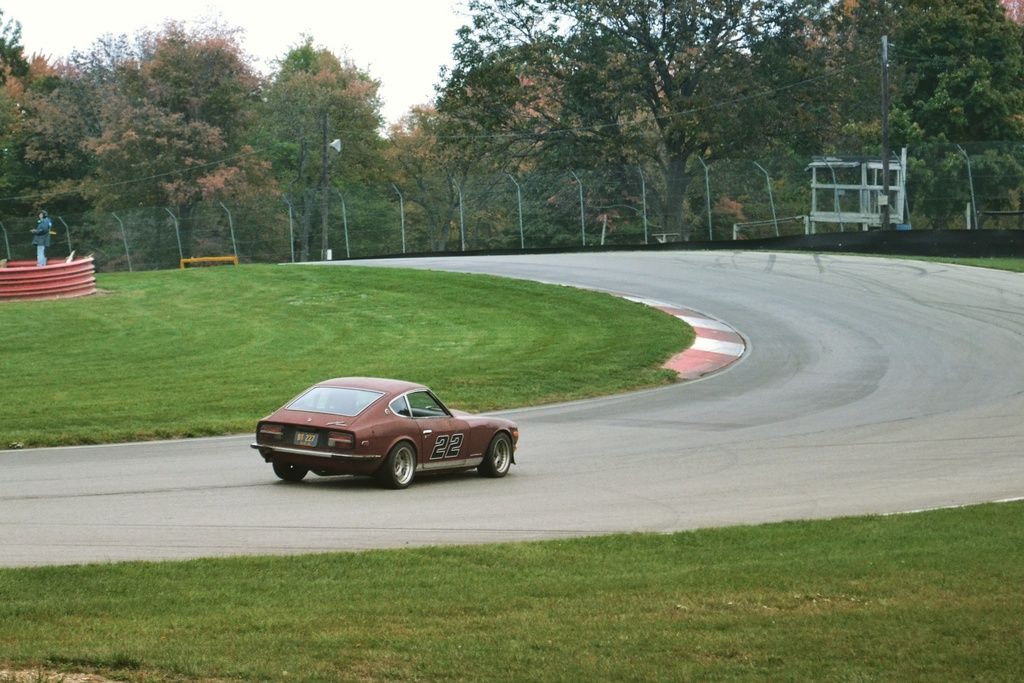
first track day - SCCA PDX at Mid Ohio - CLICK HERE
how she currently sits...
![Image]()
![Image]()
![Image]()
![Image]()
![Image]()
![Image]()
![Image]()
================================================================
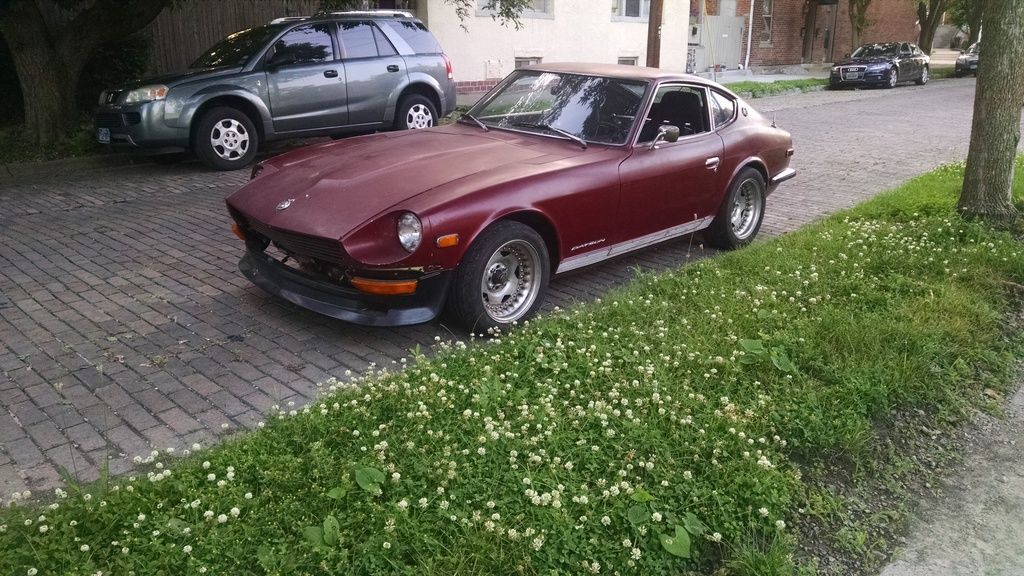
well after a huge runaround of me trying to figure out what car i really want to build for fun, street/canyon, as well as track (HPDE -> time attack -> ?), ranging from E30 to factory five 33 hot rod to cayman S to bmw 1M, i finally revisited the idea of a datsun z car and realized it was everything i wanted. old school muscley looks, great handling, and lots of potential. a couple of buddies were coming through town with a trailer and i jumped at the chance and picked up this puppy out of buffalo.
i really dont know anything about them (as well as anything having to do with carbs) so there will be lots of learning and reading (already bought 4 books :lol") . but my intention is to put a bunch of money into suspension (adj control arms, new poly bush all around ), esp since the engine/trans setup is pretty much good to go. i need to do some wheel rate/roll center measurements to figure out spring rates and sway bars. also need to figure out what i want to do about getting a LSD in there.
. but my intention is to put a bunch of money into suspension (adj control arms, new poly bush all around ), esp since the engine/trans setup is pretty much good to go. i need to do some wheel rate/roll center measurements to figure out spring rates and sway bars. also need to figure out what i want to do about getting a LSD in there.
info as posted by previous owner:
1972 240z, cali car, brought to WV while back where he got it from a couple years ago. he bought it and basically had someone do the F54 L28 engine swap. but hasnt run in over a year. hes had a few (including a pristine 250GTO kit) so knows them well enough, but has had enough that specs on this one were fuzzy.
corrected:
its a 1979-1980 280ZX N42 Block (-10.9cc dish top pistons, 86 mm bore) and N47 head (diamond shape exhaust ports, emission liners, steel valve seats) giving 8.29:1 compression, 44.6 cc comb chamber
(N47 head on F54 block puts compression in mid 10:1 range....)
as he stated:
NYS Inspected
Custom Aluminum Intake (bought off a custom shelf?)
Triple 45 DCOE webers aluminum intake
New plugs
New wires
New cap new rotor
New fuel filter
New electronic ignition (glad for this)
new crome coil 40,000
Rebuilt carb.'s
New battery
New belts
Original spare
Gas tank removed cleaned inside and out, painted, and reinstalled (funny, doesnt look like its moved in 40 years)
New fuel pump
New intake gasket
New 2 1/2 exhaust muffler and tip
New pressure plate
New Clutch
New throw out bearing
also has 5 spd from the ZX which I'm super happy about, as that was going to be a for-sure initial mod
it seems to have been originally yellow, and somebody a long time ago did a crap job of painting right over it (with a different kind of paint that a body guy could likely identify). however it is basically my favorite color for the z so ill just clean up the edges and touch it up with rattle cans. aka it will be ratty the trim needs to go. not sure how confident i am in my welding skills to make filling the holes 'pretty' but something will be done there.
so heres pics:
![Image]()
![Image]()
![Image]()
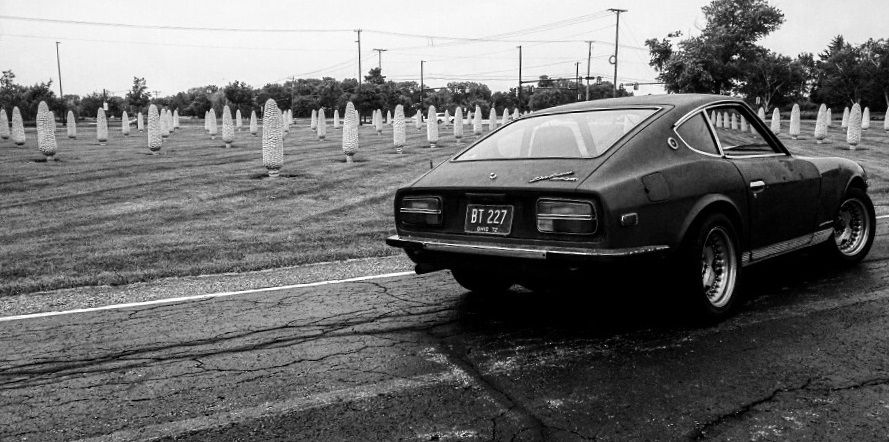
astonished that its even smaller than the RS. god bless old cars and god bless small cars. and i guess that means god bless death traps :lol:
![Image]()
![Image]()
![Image]()
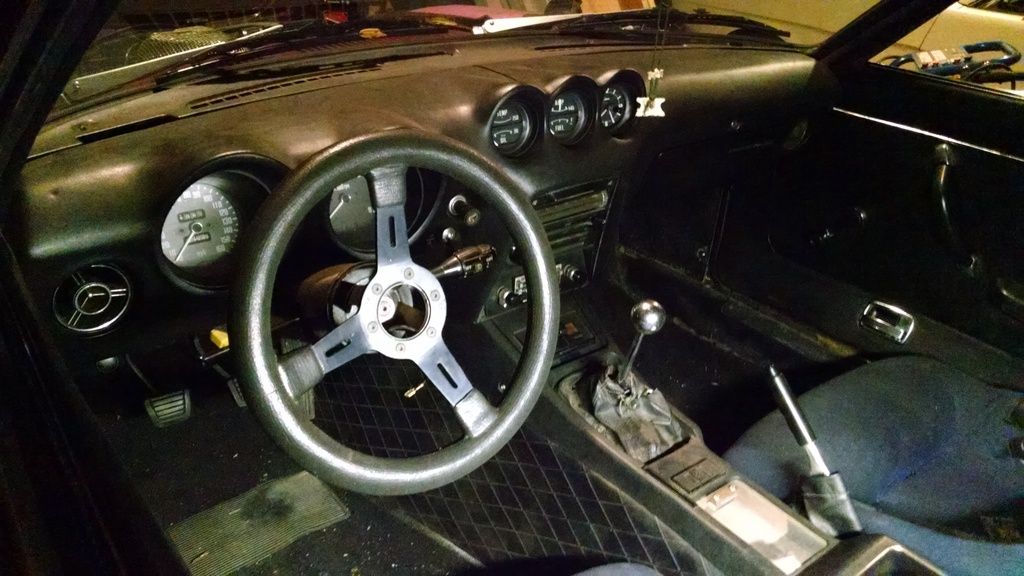
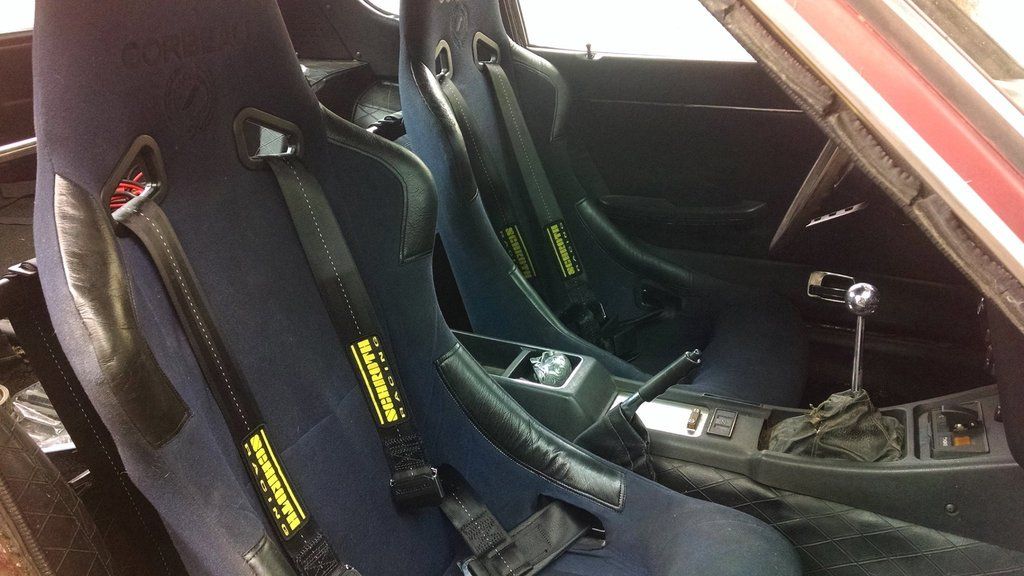
interior is super original which makes me very happy. will likely be keeping most of it from a visual standpoint in lieu of stripped track car route. basically remove sound deadening but use original carpet etc, eventually add cage.
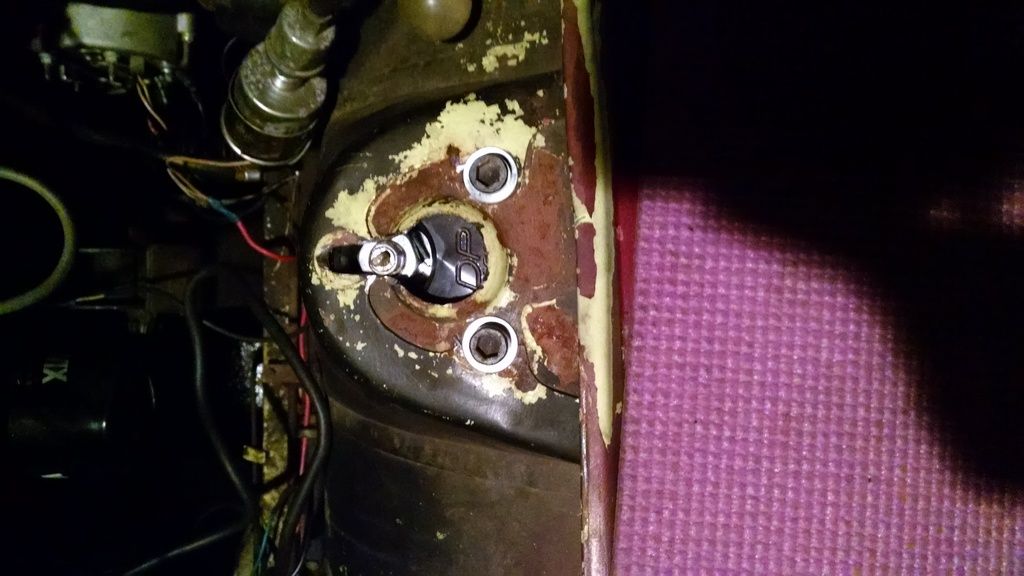
curious as to whats under the dash cap, he said he had never removed it
![Image]()
![Image]()
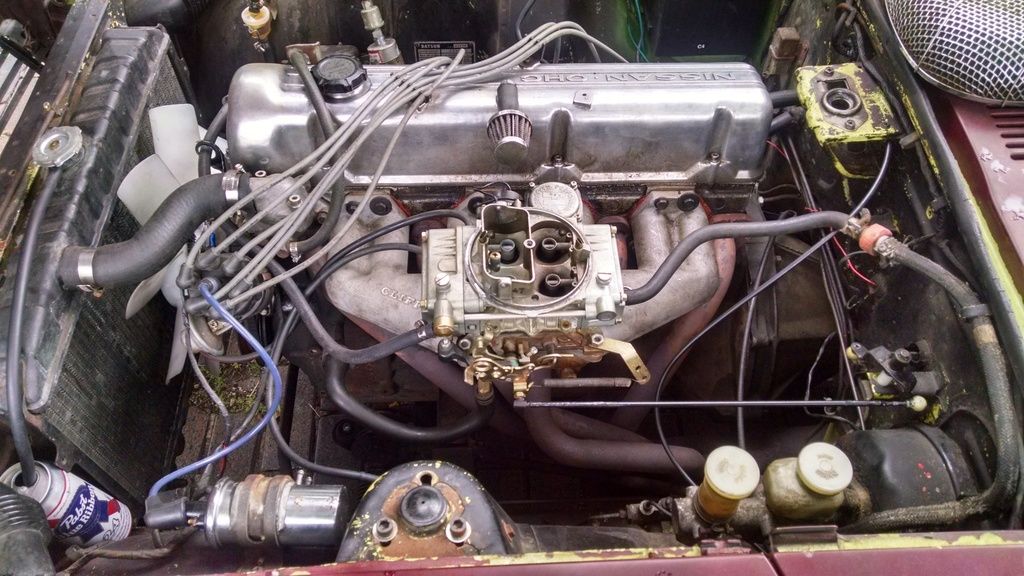
engine:
![Image]()
yup that says N47 :lol:
![Image]()
L28, will check piston info from other numbers
![Image]()
was stupid lucky this thing already had webers. its also what sold me on buying even though ti wasnt running, just being that the collection of parts were worth the price and im ok with some work. would be good from teh standpoint of learning about the car anyway. mouth: prepare for foot.
![Image]()
6-1 headers im assuming are from MSA
![Image]()
lighting is nice so took a bunch of night pics before she gets torn apart
![Image]()
![Image]()
![Image]()
![Image]()
this is one happy dude
![Image]()
![Image]()
![Image]()
![Image]()
as you can see, working on a narrow ass one way cobblestone street sucks ass, especially in ohio winters sucks ass
![Image]()
so luckily after printing out flyers kindly offering to rent garage space and posting them on all my neighbors doors somebody called back!
![Image]()
to add to the blessing he was the only one to call back, and was offering space in teh ABSOLUTE closest garage (one pictured behind my buddy dropping it like its hot :lol
![Image]()
nice stable mate, 65
![Image]()
some decent pictures - CLICK HERE
2015 track prep - CLICK HERE
first event - SCCA SOLO/autox - CLICK HERE
proper photoshoot - CLICK HERE
first track day - SCCA PDX at Mid Ohio - CLICK HERE
how she currently sits...

================================================================
well after a huge runaround of me trying to figure out what car i really want to build for fun, street/canyon, as well as track (HPDE -> time attack -> ?), ranging from E30 to factory five 33 hot rod to cayman S to bmw 1M, i finally revisited the idea of a datsun z car and realized it was everything i wanted. old school muscley looks, great handling, and lots of potential. a couple of buddies were coming through town with a trailer and i jumped at the chance and picked up this puppy out of buffalo.
i really dont know anything about them (as well as anything having to do with carbs) so there will be lots of learning and reading (already bought 4 books :lol
. but my intention is to put a bunch of money into suspension (adj control arms, new poly bush all around ), esp since the engine/trans setup is pretty much good to go. i need to do some wheel rate/roll center measurements to figure out spring rates and sway bars. also need to figure out what i want to do about getting a LSD in there.info as posted by previous owner:
1972 240z, cali car, brought to WV while back where he got it from a couple years ago. he bought it and basically had someone do the F54 L28 engine swap. but hasnt run in over a year. hes had a few (including a pristine 250GTO kit) so knows them well enough, but has had enough that specs on this one were fuzzy.
corrected:
its a 1979-1980 280ZX N42 Block (-10.9cc dish top pistons, 86 mm bore) and N47 head (diamond shape exhaust ports, emission liners, steel valve seats) giving 8.29:1 compression, 44.6 cc comb chamber
(N47 head on F54 block puts compression in mid 10:1 range....)
as he stated:
NYS Inspected
Custom Aluminum Intake (bought off a custom shelf?)
Triple 45 DCOE webers aluminum intake
New plugs
New wires
New cap new rotor
New fuel filter
New electronic ignition (glad for this)
new crome coil 40,000
Rebuilt carb.'s
New battery
New belts
Original spare
Gas tank removed cleaned inside and out, painted, and reinstalled (funny, doesnt look like its moved in 40 years)
New fuel pump
New intake gasket
New 2 1/2 exhaust muffler and tip
New pressure plate
New Clutch
New throw out bearing
also has 5 spd from the ZX which I'm super happy about, as that was going to be a for-sure initial mod
it seems to have been originally yellow, and somebody a long time ago did a crap job of painting right over it (with a different kind of paint that a body guy could likely identify). however it is basically my favorite color for the z so ill just clean up the edges and touch it up with rattle cans. aka it will be ratty
the trim needs to go. not sure how confident i am in my welding skills to make filling the holes 'pretty' but something will be done there.so heres pics:


astonished that its even smaller than the RS. god bless old cars and god bless small cars. and i guess that means god bless death traps :lol:


interior is super original which makes me very happy. will likely be keeping most of it from a visual standpoint in lieu of stripped track car route. basically remove sound deadening but use original carpet etc, eventually add cage.
curious as to whats under the dash cap, he said he had never removed it


engine:

yup that says N47 :lol:

L28, will check piston info from other numbers

was stupid lucky this thing already had webers. its also what sold me on buying even though ti wasnt running, just being that the collection of parts were worth the price and im ok with some work. would be good from teh standpoint of learning about the car anyway. mouth: prepare for foot.

6-1 headers im assuming are from MSA

lighting is nice so took a bunch of night pics before she gets torn apart


this is one happy dude


as you can see, working on a narrow ass one way cobblestone street sucks ass, especially in ohio winters sucks ass

so luckily after printing out flyers kindly offering to rent garage space and posting them on all my neighbors doors somebody called back!

to add to the blessing he was the only one to call back, and was offering space in teh ABSOLUTE closest garage (one pictured behind my buddy dropping it like its hot :lol

nice stable mate, 65