Subaru Impreza GC8 & RS Forum & Community banner

DIY: cv boot replacement

51K views 25 replies 17 participants last post by  Nick Mastropieri  
#1 · (Edited)
This is the second cv boot I've done on my car. This cv boot install is for the inner boot, the out cv joint is slightly different.
What you will need for the boot:
Flathead screwdriver
Tin snipes
External snap ring pliers
Knife
2 cans of brake cleaner or carb cleaner
Lots of rags, it gets a little messy
1 1.75"-.75" hose clamp
1 3.5"-2.5" hose clamp
1 oem cv boot kit

Disclaimer: I assume no responsibility if you screw it up. Use your judgement on how mechanically inclined you are.

Step 1:
Follow solbey11s'front axle replacement

Step 2.
Pry open the original clamps with the flathead screwdriver. This loosens the clamp.


Step 3.
Use the tin snipes to cut the clamps.
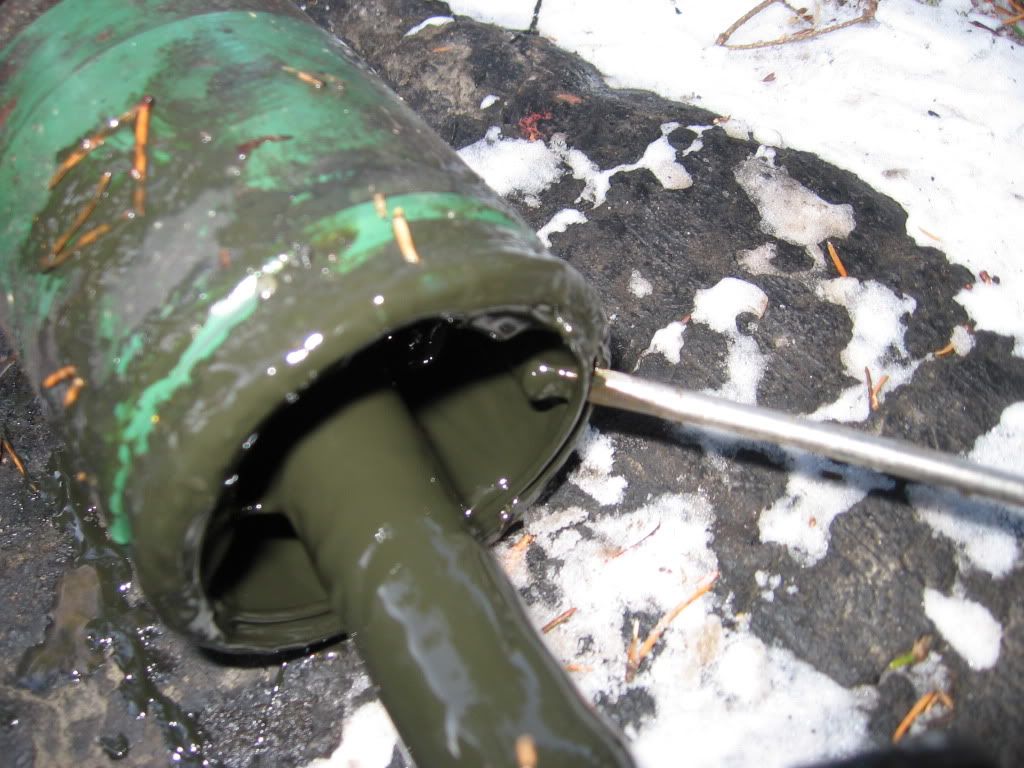

Step 4.
Cut off the old boot.
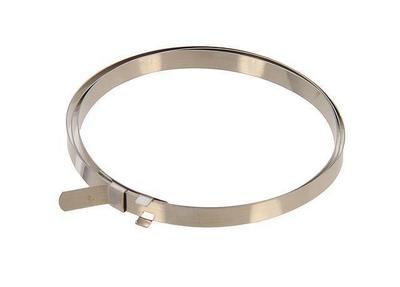
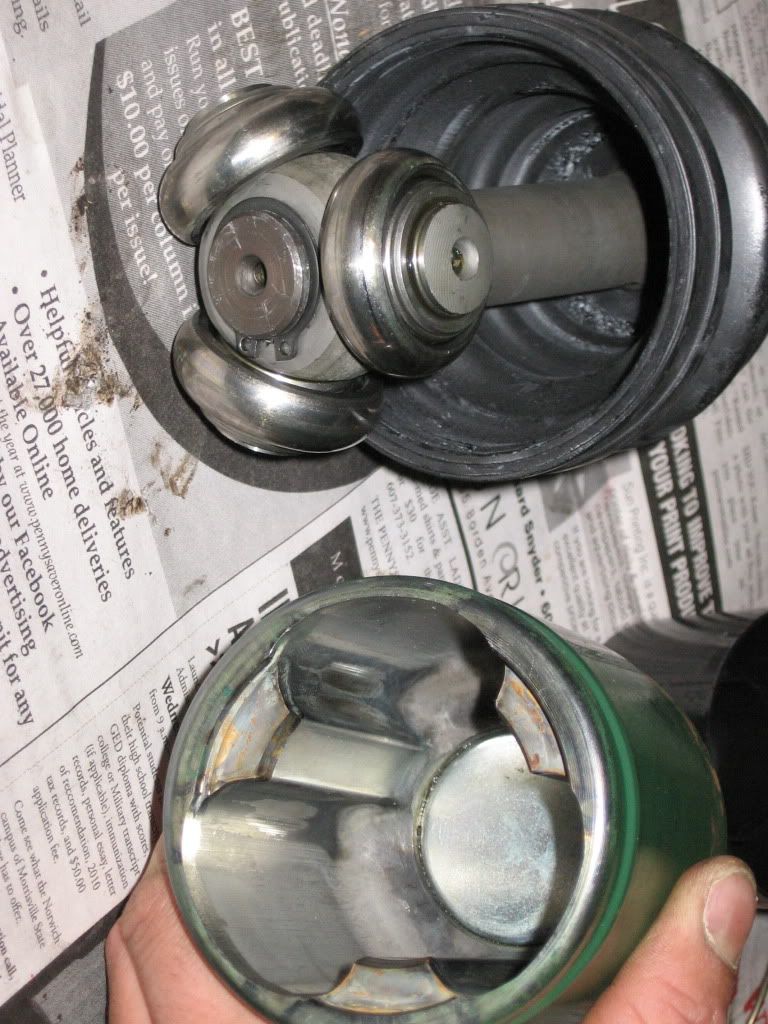

Step 5.
Locate The metal ring and pry it out.
Image
 
#2 · (Edited)
Step 6
Pull the axle out of the green piece. Note how the rings are positioned, flat side in, the tapered side out.
Image


Step 7
Wipe off the excess grease or spray it down with the brake cleaner. Remove the snap ring with the pliers. Be careful when you remove it, it's under tension, if it slips it will go flying. The triple knob metal piece will now slide off. Note the position of the metal ring.
Image


Step 8
Clean the axle again after you remove the universal. Slide the boot over the axle. You can slide it past where it normally sits to give yourself more room to work, or put it on regularly.
Image


Step 9
Clean all the parts from the joint, spray them down really good. Make sure there is no old grease on or in them. You'll use less brake cleaner if you wipe off as much of the excess grease as possible.


Step 10
Slide the universal back on to the axle and reinstall the snap ring. In the picture I did not grease the rings as in step 11. Once the green piece is degreased you can clearly see where the metal ring sits.
Image


Step 11
Grease the metal rings and universal. Put the rings back on the universal. Tapered side out, flat side in.


Step 12
Squeeze the grease into the green piece. Carefully slide the axle back into the green piece. You don't want the metal rings to fall off.


Step 13
Slide the retaining ring over the axle and reinstall it in the green piece. Try and position it so the opening in the ring is under a lip.
Image


Step 14
I pushed the axle into the green piece to get some more grease on the universal. Slide the boot into its proper position. Really work the joint around to get grease on the joint. It should move around smoothly. Keep in mind the boot is not clamped on at this point.


Step 15
I used hose clamps because i dont know where to get the proper tool to tighten the clamps that came in the kit. On the other boot i used a ground down pair of pliers to squeeze the bump to tighten it. I feel that the boot is tighter on the axle using the hose clamp. I didnt have a small clamp on had, i had to run down to the auto parts store and get one. I installed it on the car.
Image


Step 16
Reinstall the axle per solbey11s' front axle replacement

Step 17 drive the car and make sure there are no strange noises or anythng out of the ordinary.
 
#6 · (Edited)
here are some pics

Here's where it puked
Image


Here's the rip
Image


Unbolted the sway bar and ball joint. Rubber mallet helps
Image


This is the angle i used to knock the pin out og the axle (used an extension to reach)
Image


Pulling off the clamps
Image


Cut off the boot
Image


removed ring that holds it together
Image


Cleaned up a bit. snap ring is visable here. (get the right tool - i didnt have it and it was a PITA)
Image


Heres the contents to teh beck arnley kit
Image


Stock (cut) boot next to the new one
Image
 
#7 ·
bump, i just recently found out both my cv boots up front are ripped, i thought it was oil from the driver side head but it was grease from the cv boot that got all under my car. How bad is it to drive around with little to no grease in there? i know its probably a stupid question but i need to get around!
 
#8 ·
Eventually if you keep driving on it, they will start clicking. Mostly during turns. Then they will click in a straight line, and eventually the ball bearings will give out and you won't be able to move.

...I've done it before... :lol:
 
#9 ·
Sorry, I haven't been checking up on the thread. I don't have the pics any more.:( I uploaded them, then deleted them off of the camera. I should have used photo bucket.

Thank you for the pictures moogoob!

MCV: You should try and get it fixed as soon as possible. All kinds of crap is getting at the joint and potentially grinding up into an abrasive paste. As long as your axles aren't clicking I think they are still in ok condition.
 
#11 ·
cueball- what kind of grease did u use for the inner cv boots? I am purchasing the beck arnley kit for inner boots and it doesn't come with grease like the outer kit does. hoping to get the stuff by sunday so i can do the install, doubt it though.
 
#15 ·
Put some more pictures up, should be pretty straight forward.


I probably spent $25-$30 in total to do the latest cv boot. OEM axles are ~$350 from the dealer, axles from the auto parts store range from $50-$100. IMO the auto parts store axles don't have the same quality as the OEM ones, it seems to be hit or miss on getting a good axle. That's why I prefer to change the boot if I can.
 
#18 ·
Thanks for the write up.

A couple things to note for future viewers:

-The steps are basically the same for a 04' Legacy L.
-When trying to pop out the peg that attaches the axel to the transmission, keep hold of it so you don't lose it. Mine flew out like a rocket and now I'm using a long screw and nut instead.
-Be careful with your rubber grease things around the tie rod end and ball joint. If you press to hard on them to remove them, they can crack.
-I know I'll take some flack for this but you can avoid taking out the axel nut and remove the entire axel and steering knuckle if you are fixing the inner boot. It eliminates the possibility of damaging the wheel bearing.
-Took me about 10 hours to do but if I had to do it again would probably take only 3.
 
#19 ·
-When trying to pop out the peg that attaches the axel to the transmission, keep hold of it so you don't lose it. Mine flew out like a rocket and now I'm using a long screw and nut instead.
Those pegs should be replaced when you do this service. They're like $5 or something. Do it and be safe. The way you have it rigged up is awesome if you're out in the middle of a the Acropolis Rally and that's all you have (why on earth you would changing an axle boot is another story, heh). No so great for daily driving if you have access to the right parts.

/rant
 
#21 · (Edited)
Inner Oil Seal on hub removal?

Did any of you replace the inner oil seal on the inside of the wheel hub? I was on legacy forum and they said that manual suggest to replace that. Mine looks fine, but I tried to remove that thing even with the claw hammer and is quite difficult with the steering end rod and the hub still attached to the car. Mine looks very intact and I don't want to damage it using the claw hammer. Any tricks to take that out or just leave it in there?

part no. 28015AA080

DIY front cv axle & boot replacement - Subaru Outback - Subaru Outback Forums

Image
 
#25 ·
Bump, good write up! May do this instead of replacing the axle from my donor wrx.

Not sure how long the axle ran with a split boot though. Everything feels smooth with no binding, but I guess I'll inspect for wear when I get it pulled open and cleaned up

Thanks again for the write up/info!