This is a work-in-progress guide. You'll need to do lots more research on various forums before attempting this project.
Important Note: This guide was done on a 97' Legacy, so TMIC fitment will be different.
If you ever decide to turbo your DOHC engine, this is probably the simplest way to do it besides getting a kit, which are rare, and probably more expensive. For you SOHC guys, the whole thing is basically the same, but you'll need to extend your up-pipe to clear the back of the SOHC head, as well as bend your FPR.
IMPORTANT: Engine Management
If you have a 2001 or newer car, you should either buy a WRX, swap, or use open-source tuning to run your FI setup.
Here's the deal. If you use 91 octane, a good fuel pump, and have a good intercooler, you can run < 5 PSI without engine management with reasonable safety. The factory knock control system can deal with additional power. However, any more boost than that requires an engine management system. This stuff has been covered a lot before, but I'll outline it. If you have a pre 2001 car, here are some options that people have had success with:
Emanage Ultimate (Probably the most powerful piggyback. Sometimes a huge PITA, though)

Other piggybacks:
RalliTEK PP6
Greddy Emanage
Apexi S-AFC (not recommend)
AEM F/IC
Standalones: I
Megasquirt >>> http://www.rs25.com/forums/f105/t135220-diy-megasquirt-inside-stock-ecu-case.html
AEM
The limit of the stock 280cc injectors is about 6 PSI, so if you want to run more than that, you'll need larger injectors, such as blue and pink WRX/STi top feeds, or yellow STi 04-06 side feeds.
So.
First off, here's a list of parts I bought, about 2 weeks in advance of my planned install weekend.
I got a bunch of this stuff from eBay, so I'll copy the titles in so they're easier to find if you ever decide to do this.
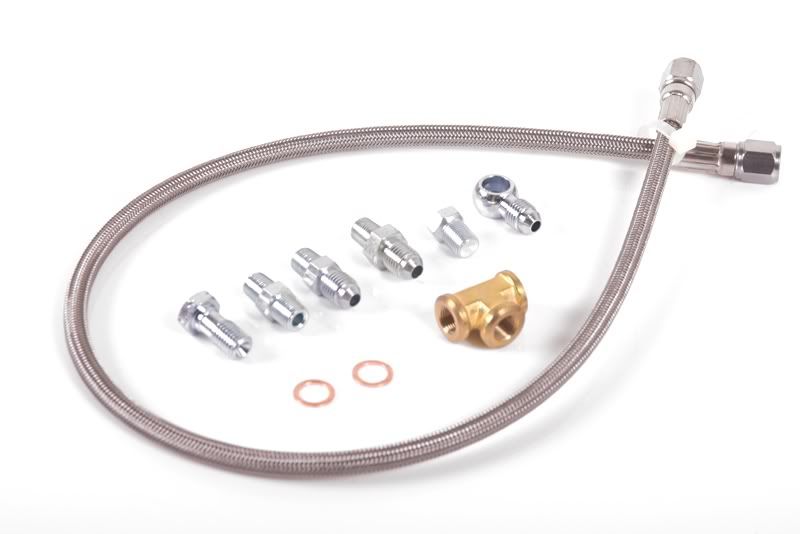
Turbo Oil Feed line Kit M10 x 1.50mm TD04 TD05 TD06 - UPDATE: The brass fitting here is very weak. Go to ACE and get a 1/8" NPT T to replace it.
![Image]()
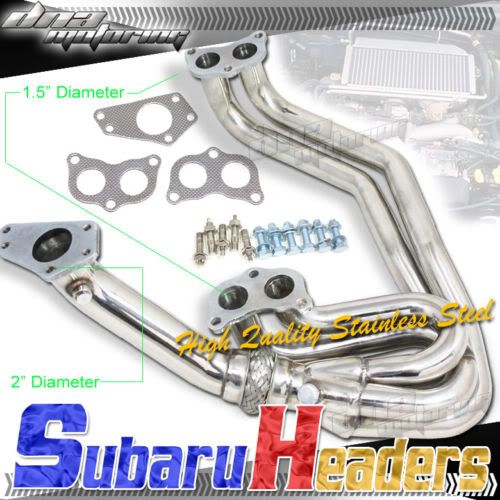
IMPREZA WRX/STI 1P EJ25 STAINLESS STEEL HEADER MANIFOLD - UPDATE - I've switched to a ported stock turbo manifold + turbo water pump. Much better spool and low end response.
I know for sure that this one will clear the N/A water pump, but the OEM WRX manifold will not clear it.
![Image]()
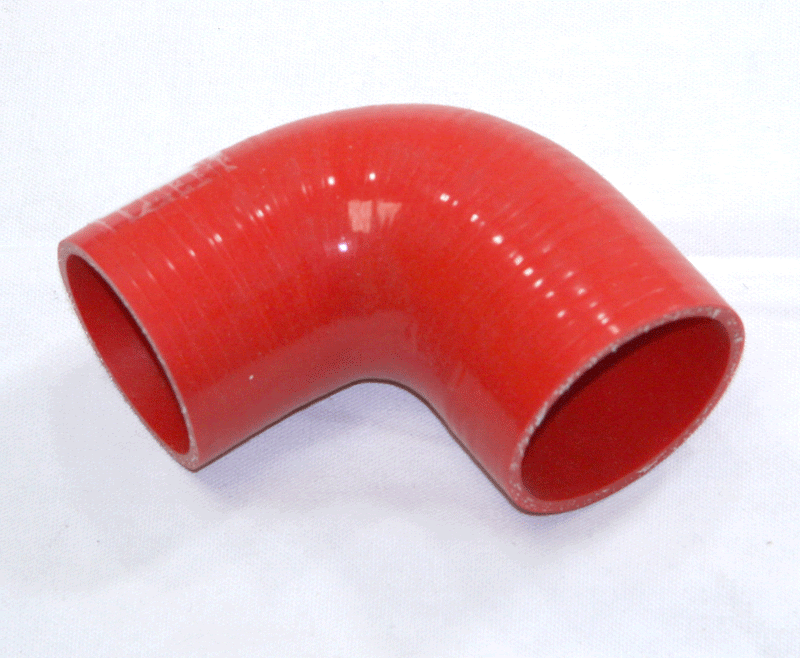
Reducer Silicone Hose Coupler 90 degree 2.5" to 2.25"
![Image]()
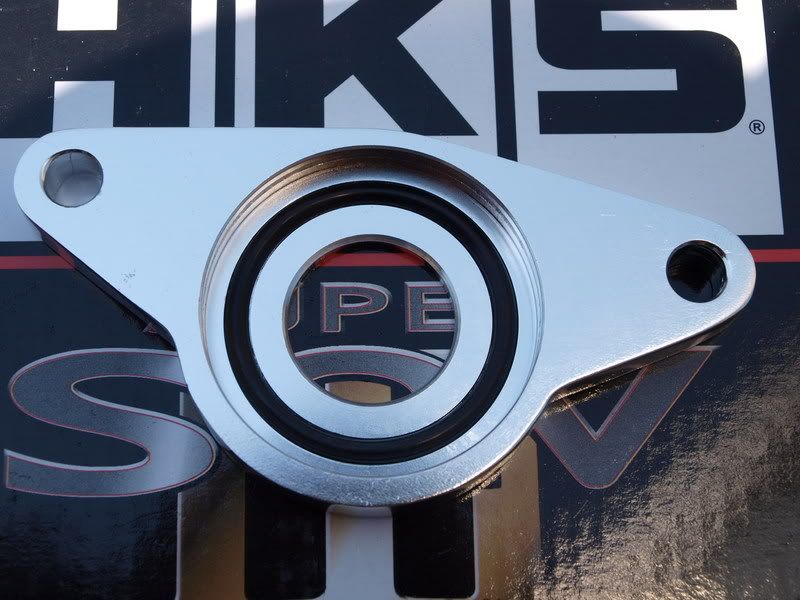
SUBARU HKS BLOW OFF VALVE BOV ADAPTER FLANGE - UPDATE - You can use different BOV's that will clear the throttle better. I'd recommend making a hose adapter for the TMIC, and remote-mounting your BOV/BPV.
Obviously, you'll need an HKS-type valve for this, but you can use any BOV you want, just realize that there's not a ton of space to work with.
![Image]()
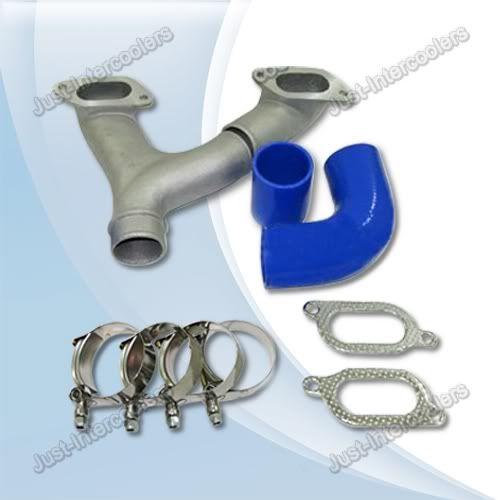
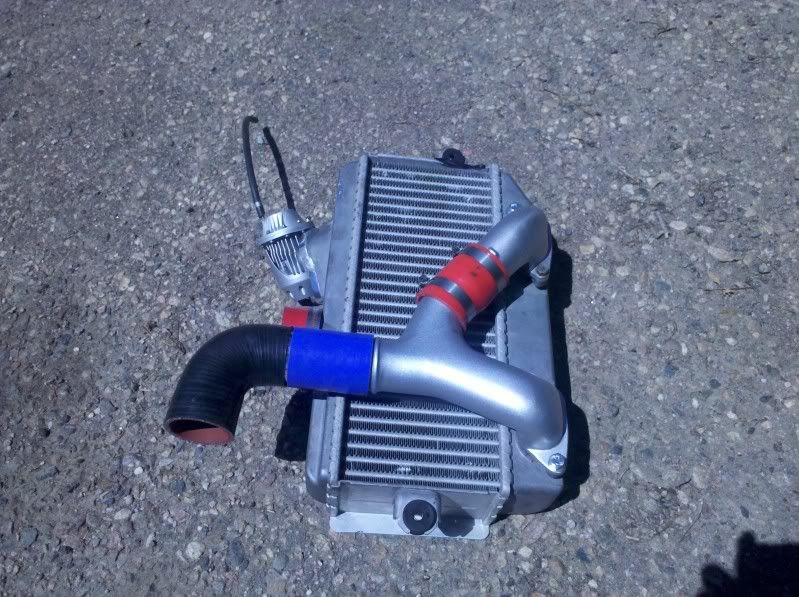
02-07 Subaru WRX STi Top Mount Intercooler Y Pipe Kit
![Image]()
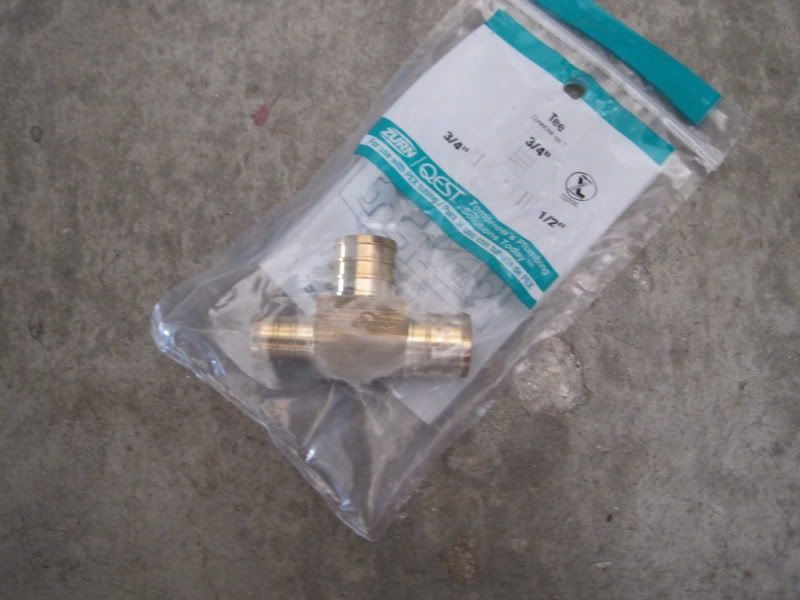
(ACE) 3/4" to 1/2" brass "tee"
![Image]()
OTHER PARTS:
-Turbo crossmember w/ turbo swaybar (N/A ones don't fit)
-Downpipe of your choice 02-07 WRX fitment (if you extend your up-pipe because of the SOHC heads, this'll have to be modified)
-Catback of your choice (or open stock WRX downpipe, sounds great and is cheap)
-2" straight silicone coupler
-2.5" - 3" silicone reducer
-2.5" "U" bend of aluminum pipe
-02-07 WRX TMIC (I used an 02, but the 06-07 fit much better)
-Turbo of your choice (I used a TD04 just to get it up and running, a VF34 will come soon)
-A 90 degree, 3/8" brass hose fitting for the drain to the valve cover
-2x 1/2" brass hose fitting for breathers/IACV/PCV
-Blow-off valve of your choice (I used an SSQV)
-2.75" straight silicone coupler (for the IC-TB connection)
-8 feet of 1/2" rubber hose
-2 feet of 5/8" rubber hose
- Lots of hose clamps
-More things I'm forgetting, and will add later
Since my car is a daily driver, I planned out how I was going to do the install. Here's the basic outline of the main install. The first two days can be done any time, provided you have N/A headers, like Borlas, that will clear the turbo crossmember so you can drive around.
Day 1: Install turbo crossmember
Day 2: Tap valve cover, trim firewall and test fit intercooler
Day 3: Install everything!
Day 4: Repair small leaks, random problems, make everything look nice
Day 5: Tune
That's obviously a rough guide, but it gives you an idea of the time it takes to finish this sort of a project if your car is a DD.
The first thing you should do is install your turbo crossmember. Any 91-94 Legacy turbo crossmember will be a direct bolt-on. This is a pretty big install, so plan to do this ahead of time. An important note: The stock N/A headers won't clear the crossmember, so plan on using a set of Borla replicas (they clear the turbo crossmember), or just having your car offline while you put everything in. I don't have any pictures of this install, but just know that it involves unbolting the following:
-engine mounts
-steering rack
-both control arms
-swaybar
-crossmember itself
-U-joint to the steering wheel
Here's what it looks like.
![Image]()
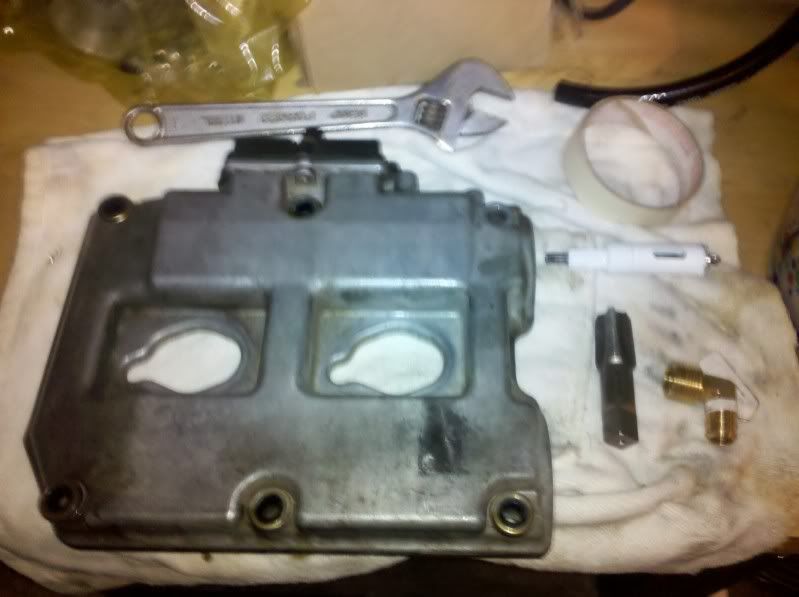
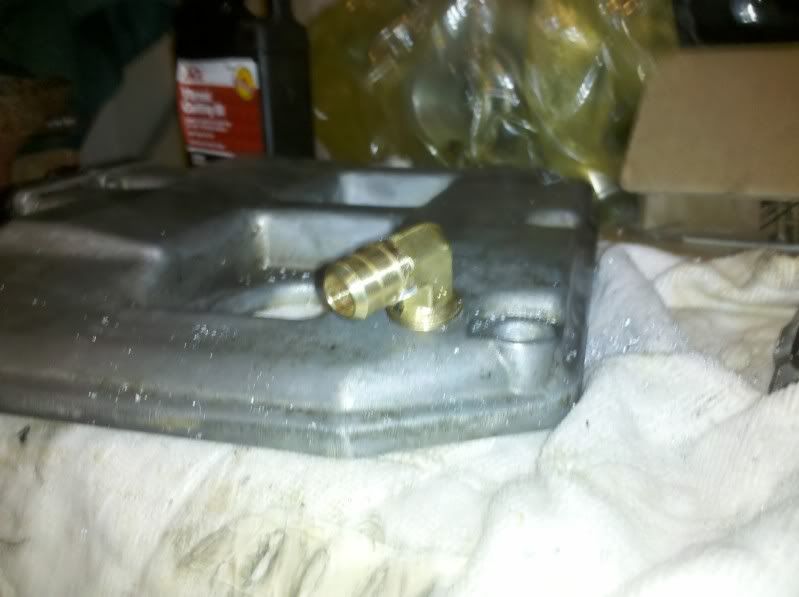
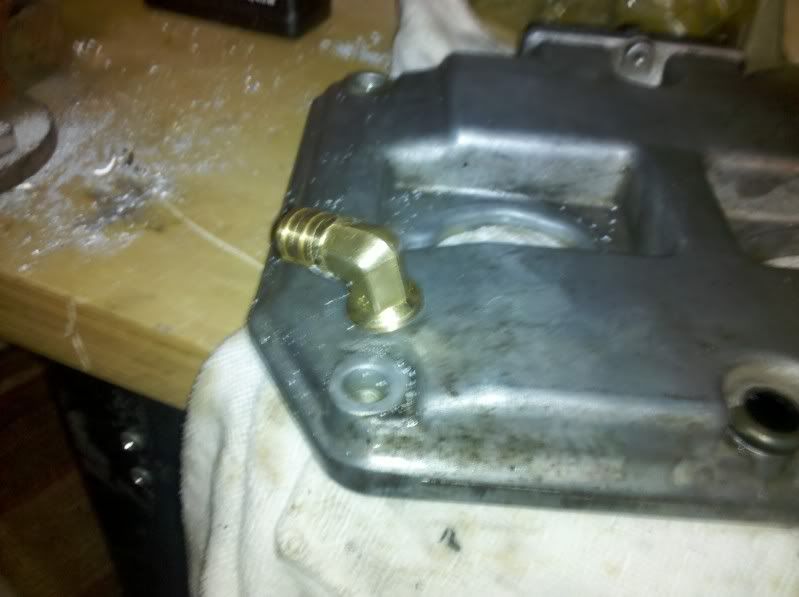
Next thing to do is tap the valve cover for the turbo's oil drain. I used the 90 degree fitting, drilled a hole, then screwed it in with teflon tape. A rubber stopper went in the hose end so it wouldn't leak while I waited for other parts to come in. I used a 3/4" drill bit, then just screwed the fitting in.
![Image]()
![Image]()
![Image]()
The next step is really only necessary if you have an 02-05 intercooler. The 06-07 TMIC's are much shorter an don't have fitment issues. Basically, this step involves grinding away part of the lip on the firewall, under the brake lines. I don't think there;s anything really structural, and grinding away a bit won't do much to weaken the unibody.
Before, the firewall area looks like this:
![Image]()
And after a bunch of cutting, grinding, and test fitting, it will look something like this:
![Image]()
Make sure and spray on some clearcoat or something to keep the bare metal from rusting.
You'll also need to shorten you clutch reservoir. This is easy, just take it off, cut it, deburr, then reinstall.
Or, you can get a sweet JDM offset reservoir from a JDM BC Legacy. They're kinda hard to find:
![Image]()
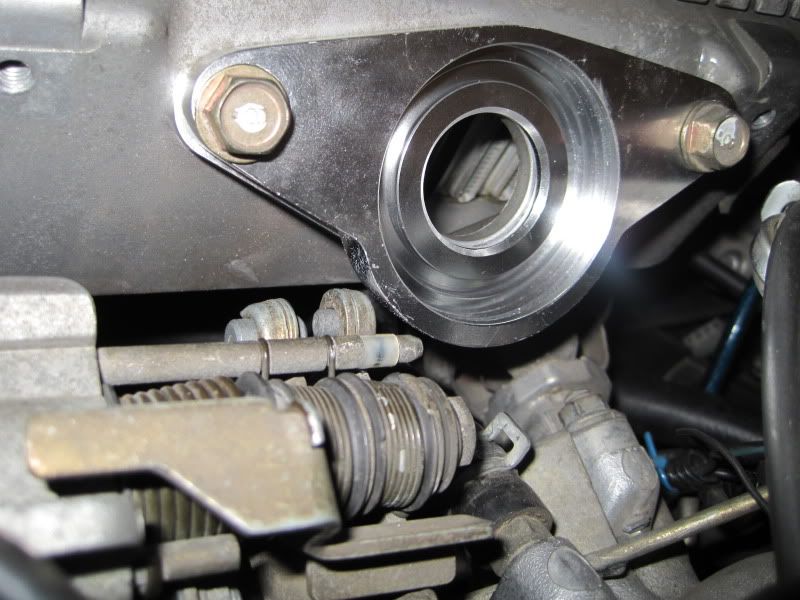
You will most likely need to trim off the throttle body and outlet of the intercooler for more clearance. Just trim 1/4" off each piece, but mak sure you have enough metal to get a coupler on there.
------------------------------------------------------------------------------------------------------
Main install:
If you have access to a lift, or better yet, a pit, use it. Otherwise just put the car on jack stands.
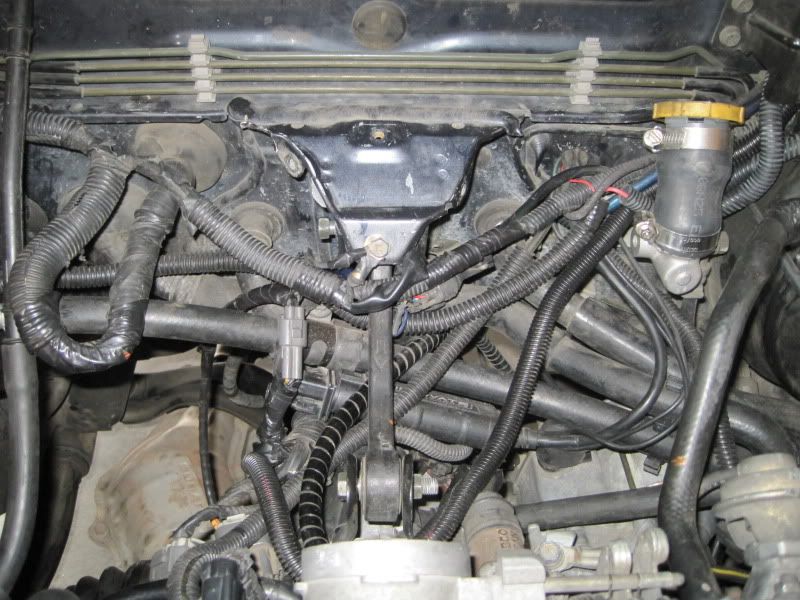
The most time consuming thing to do is re-routing the PCV, breather, and IACV lines. I don't have pictures of this, because I'm sure there's a better way to do it, but you'll need to get a T as close to the crankcase vent as possible, and make it very low, and flush to the rest of the stuff under the IACV. I made one line go under the passenger side intake manifold, looping up behind the power steering reservoir, then another under the throttle body, then around to T in with the breathers lines.
I ran the breather lines on top of the engine, and used the stock T connector to combine them.
For the IACV, I ran a short bit of hose to a 90" 3/4" barb elbow, which runs up to a fitting on the intake tube.
Here's what my hoses look like, as an idea.
![Image]()
Now, you can jack up the engine a bit, bend the power steering lines out of the way a bit, and install the manifold, using new gaskets. If you can, get ahold of one of the turbo suspending mounts, and bolt it on:
![Image]()
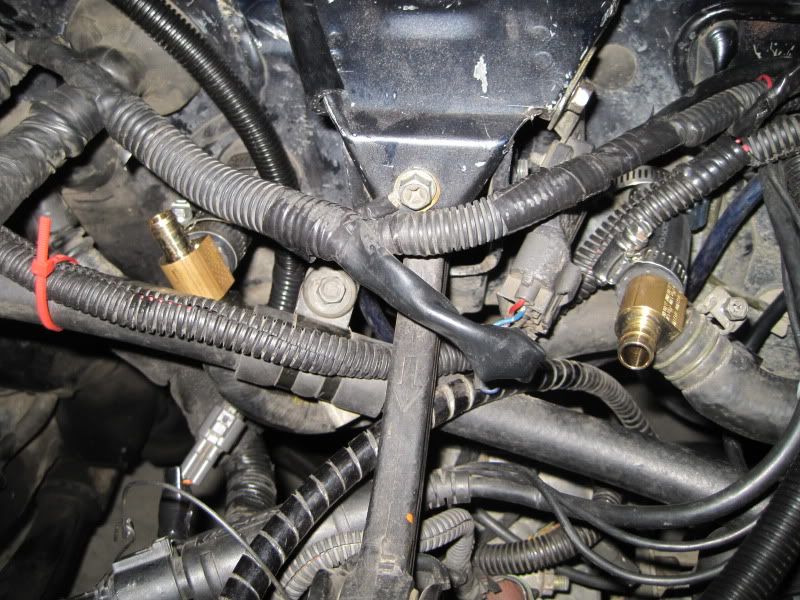
A 90 degree elbow is REQUIRED for you oil drain line; if you don't install one below the drain on the turbo, it will kink and you'll blow the seals of the turbo.
Then, wrap the line with aluminum tape, or something to keep the line safe from the heat of the up-pipe. Run the line like so:
Don't forget to clamp it and stuff.
![Image]()
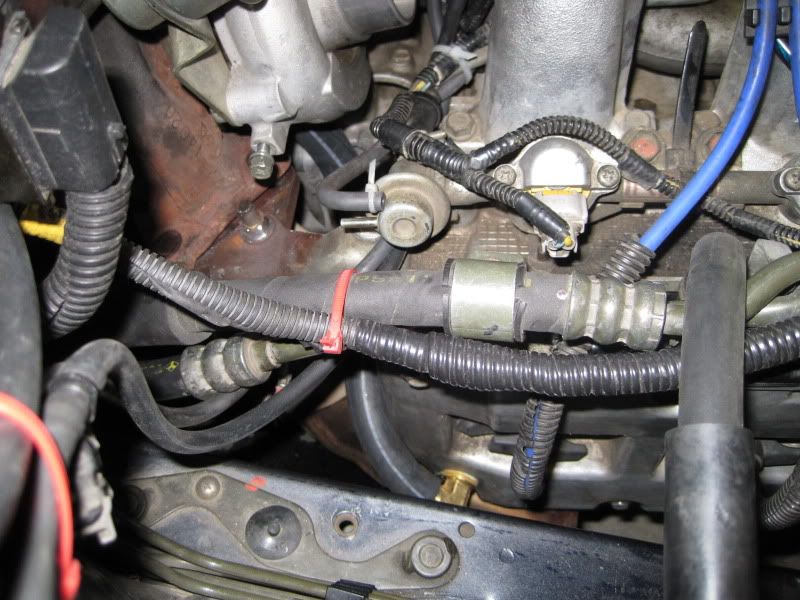
Next up to tackle: the coolant lines. I tapped into the heater core lines, using the 2 3/4" to 1/2" tees.
![Image]()
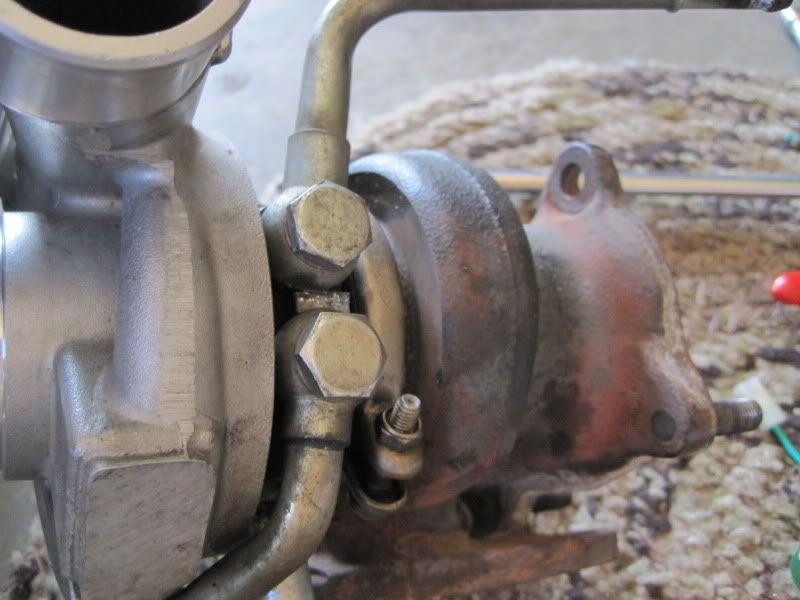
On the turbo, you need to cut the feed line in the middle so you can flip the top line back so it aims toward the firewall.
![Image]()
The, run the 1/2" line around.
![Image]()
Now, install your oil-feed lines. You can either use high-temp thread sealant for the fittings, or teflon tape. Either will work.
There's a number of different ways to arrange your 1/8" brass tee, but I made mine like this, so it won't hit the alternator.
![Image]()
Next, bolt up the downpipe of your choice.
Here's what you'll have on the intake side:
You'll need to trim the 2.25-2.5" intake coupler to let it clear the intake manifold. The 2.5" intake tube can also be cut to fit at this point. Drill the holes for the brass fittings, and install them as well.
![Image]()
As you can see, the stock WRX y-pipe won't line up, so we have to extend it to meet the turbo. I wouldn't advise cutting the stock y-pipe and trying to make it seal with a coupler. Just get an aftermarket y-pipe, trust me.
![Image]()
On the pressure side, you have to extend the y-pipe downward to meet the turbo outlet, using the extra 2" coupler and piece of pipe.
![Image]()
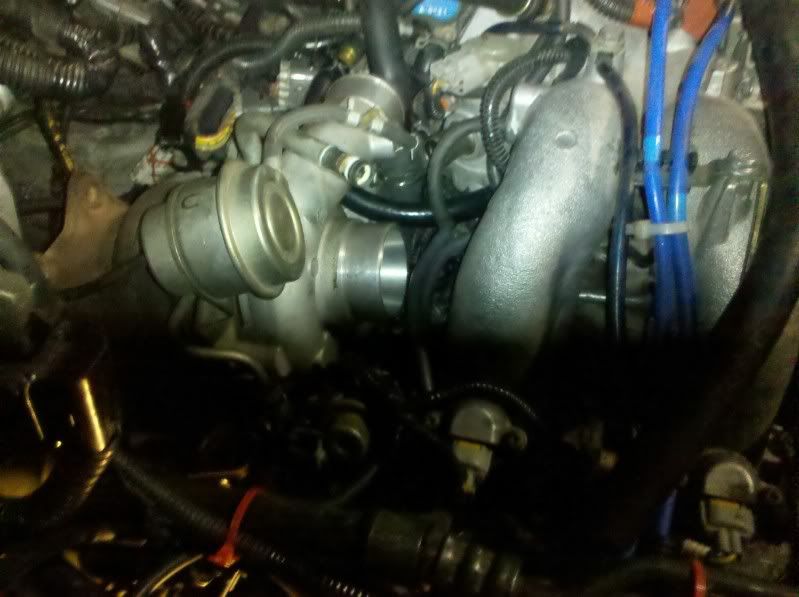
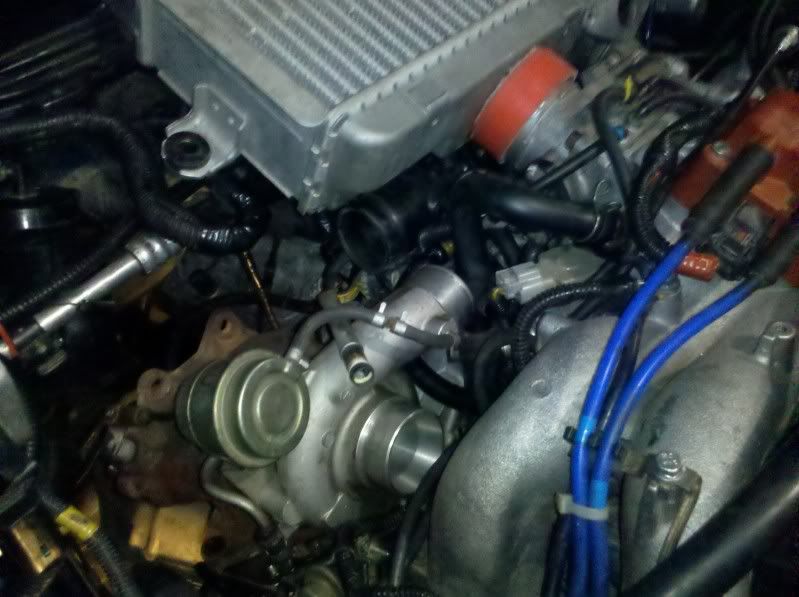
You should have something like this at this point.
![Image]()
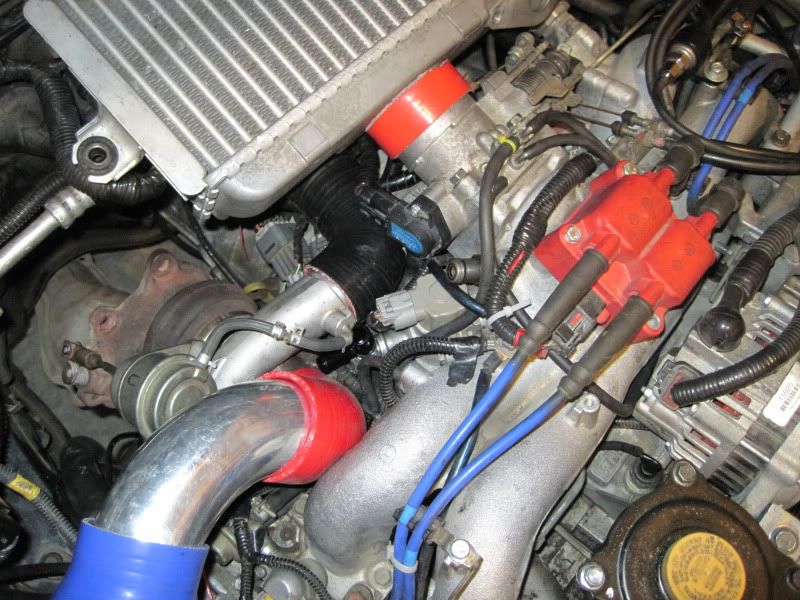
Here's everything else mocked up:
![Image]()
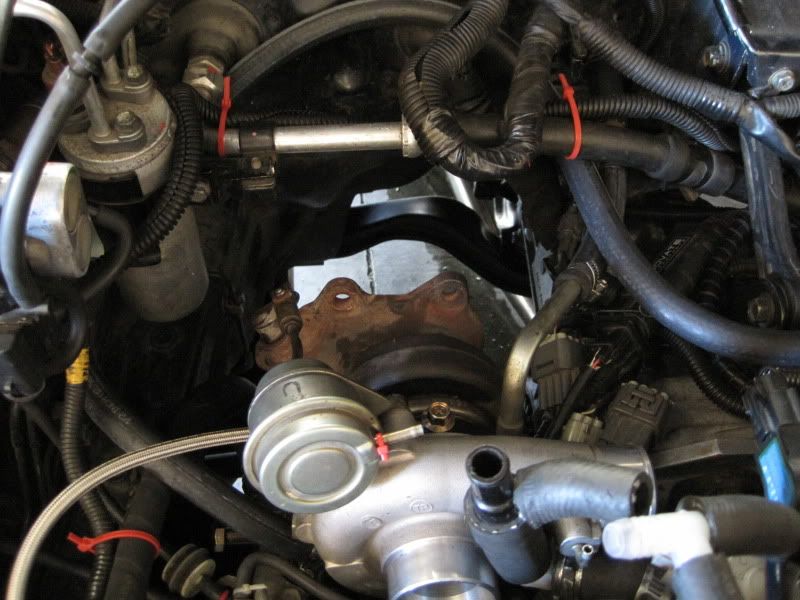
For your BOV/BPV, just bolt it on. My SSQV flange was a close fit:
![Image]()
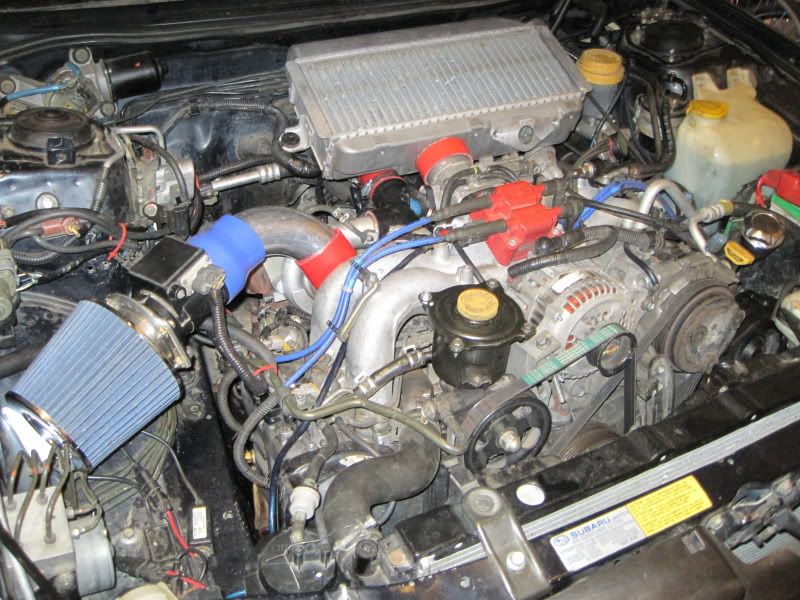
At this point, you're basically done! It's just a matter of clamping everything in place, and testing it out! I know I missed some important information, so I'll try and add it in as I remember. Don't forget to get an exhaust made/bolted on.
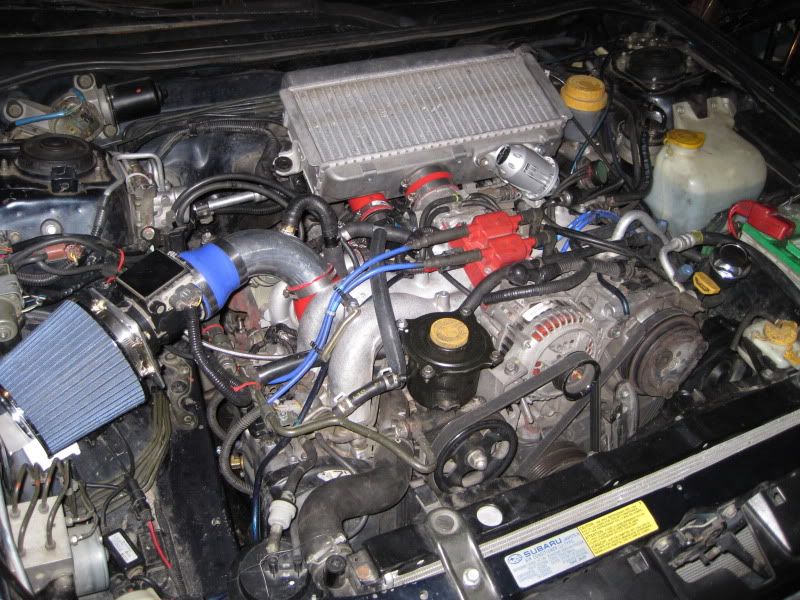
Here's my finished product:
![Image]()
Happy boosting.
Update #1:
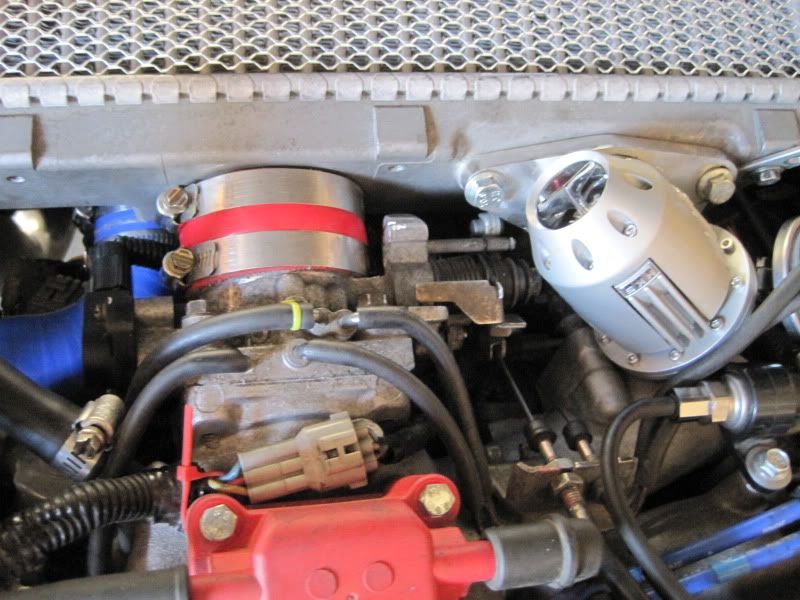
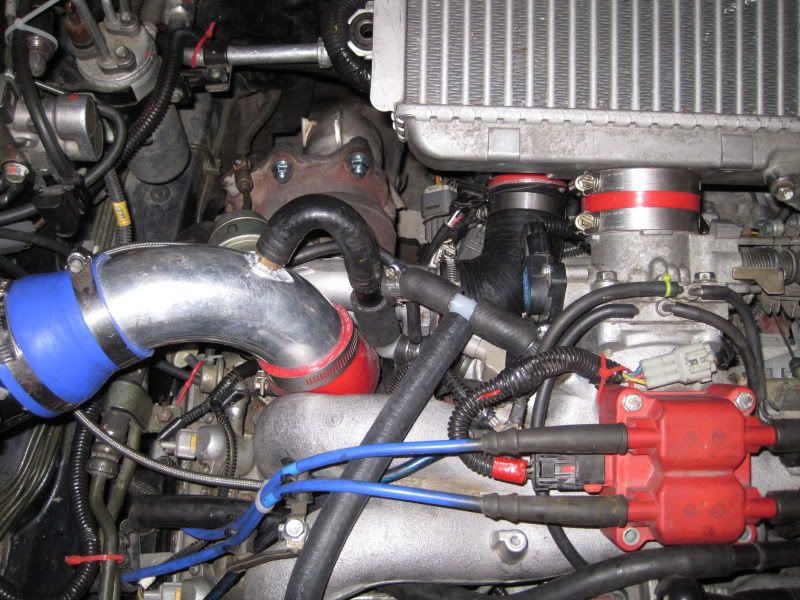
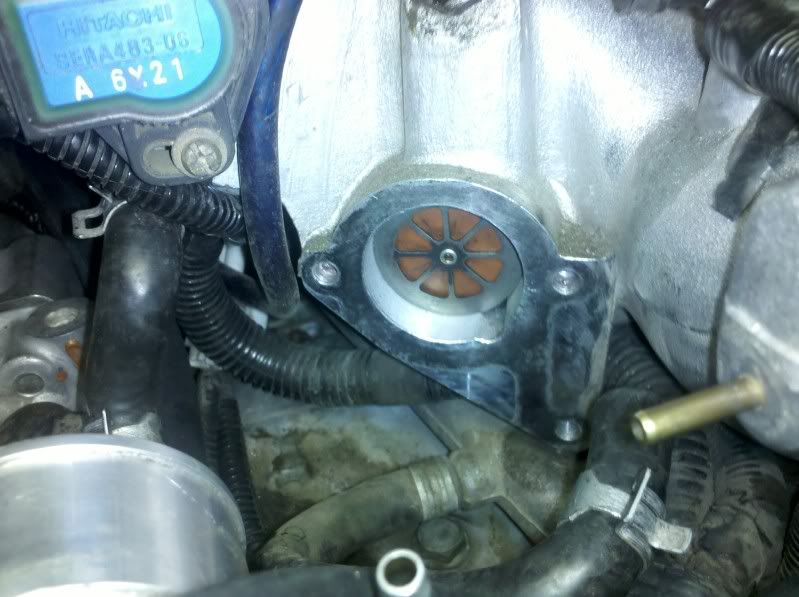
I swapped out my IACV for an EJ22t version, which has a nifty 90 degree inlet that makes it way easier to route. You phase II RS guys don't have to worry about this.
![Image]()
I found that the EJ22t has a one-way valve in the little plate behind it that prevents boost from leaking. It swaps right over to the 25D manifold.
![Image]()
Update #2
I really hated how the intercooler sits really far back, and has to be all crooked due to the EGR valve.
So, I did a couple modifications to make it sit nicer.
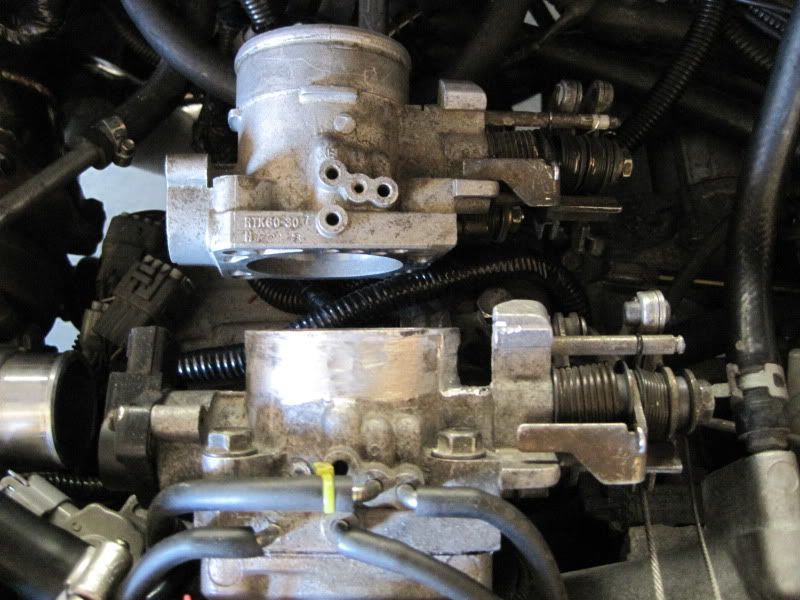
First was chopping down the throttle body. I never use cruise control, so I just took all the pieces off the threaded rods (in order), the ran a die to create new threads, cut off the excess of the rods with a grinder, and put everything back together.
On the throttle body itself, I just lopped off about an ~1.5 inches, then cut/dremeled out around the chunk of metal that holds the throttle plate arms.
![Image]()
Comparison with stock throttle body to show differences:
![Image]()
![Image]()
![Image]()
Important Note: This guide was done on a 97' Legacy, so TMIC fitment will be different.
If you ever decide to turbo your DOHC engine, this is probably the simplest way to do it besides getting a kit, which are rare, and probably more expensive. For you SOHC guys, the whole thing is basically the same, but you'll need to extend your up-pipe to clear the back of the SOHC head, as well as bend your FPR.
IMPORTANT: Engine Management
If you have a 2001 or newer car, you should either buy a WRX, swap, or use open-source tuning to run your FI setup.
Here's the deal. If you use 91 octane, a good fuel pump, and have a good intercooler, you can run < 5 PSI without engine management with reasonable safety. The factory knock control system can deal with additional power. However, any more boost than that requires an engine management system. This stuff has been covered a lot before, but I'll outline it. If you have a pre 2001 car, here are some options that people have had success with:
Emanage Ultimate (Probably the most powerful piggyback. Sometimes a huge PITA, though)

Other piggybacks:
RalliTEK PP6
Greddy Emanage
Apexi S-AFC (not recommend)
AEM F/IC
Standalones: I
Megasquirt >>> http://www.rs25.com/forums/f105/t135220-diy-megasquirt-inside-stock-ecu-case.html
AEM
The limit of the stock 280cc injectors is about 6 PSI, so if you want to run more than that, you'll need larger injectors, such as blue and pink WRX/STi top feeds, or yellow STi 04-06 side feeds.
So.
First off, here's a list of parts I bought, about 2 weeks in advance of my planned install weekend.
I got a bunch of this stuff from eBay, so I'll copy the titles in so they're easier to find if you ever decide to do this.
Turbo Oil Feed line Kit M10 x 1.50mm TD04 TD05 TD06 - UPDATE: The brass fitting here is very weak. Go to ACE and get a 1/8" NPT T to replace it.
IMPREZA WRX/STI 1P EJ25 STAINLESS STEEL HEADER MANIFOLD - UPDATE - I've switched to a ported stock turbo manifold + turbo water pump. Much better spool and low end response.
I know for sure that this one will clear the N/A water pump, but the OEM WRX manifold will not clear it.
Reducer Silicone Hose Coupler 90 degree 2.5" to 2.25"
SUBARU HKS BLOW OFF VALVE BOV ADAPTER FLANGE - UPDATE - You can use different BOV's that will clear the throttle better. I'd recommend making a hose adapter for the TMIC, and remote-mounting your BOV/BPV.
Obviously, you'll need an HKS-type valve for this, but you can use any BOV you want, just realize that there's not a ton of space to work with.
02-07 Subaru WRX STi Top Mount Intercooler Y Pipe Kit
(ACE) 3/4" to 1/2" brass "tee"
OTHER PARTS:
-Turbo crossmember w/ turbo swaybar (N/A ones don't fit)
-Downpipe of your choice 02-07 WRX fitment (if you extend your up-pipe because of the SOHC heads, this'll have to be modified)
-Catback of your choice (or open stock WRX downpipe, sounds great and is cheap)
-2" straight silicone coupler
-2.5" - 3" silicone reducer
-2.5" "U" bend of aluminum pipe
-02-07 WRX TMIC (I used an 02, but the 06-07 fit much better)
-Turbo of your choice (I used a TD04 just to get it up and running, a VF34 will come soon)
-A 90 degree, 3/8" brass hose fitting for the drain to the valve cover
-2x 1/2" brass hose fitting for breathers/IACV/PCV
-Blow-off valve of your choice (I used an SSQV)
-2.75" straight silicone coupler (for the IC-TB connection)
-8 feet of 1/2" rubber hose
-2 feet of 5/8" rubber hose
- Lots of hose clamps
-More things I'm forgetting, and will add later
Since my car is a daily driver, I planned out how I was going to do the install. Here's the basic outline of the main install. The first two days can be done any time, provided you have N/A headers, like Borlas, that will clear the turbo crossmember so you can drive around.
Day 1: Install turbo crossmember
Day 2: Tap valve cover, trim firewall and test fit intercooler
Day 3: Install everything!
Day 4: Repair small leaks, random problems, make everything look nice
Day 5: Tune
That's obviously a rough guide, but it gives you an idea of the time it takes to finish this sort of a project if your car is a DD.
The first thing you should do is install your turbo crossmember. Any 91-94 Legacy turbo crossmember will be a direct bolt-on. This is a pretty big install, so plan to do this ahead of time. An important note: The stock N/A headers won't clear the crossmember, so plan on using a set of Borla replicas (they clear the turbo crossmember), or just having your car offline while you put everything in. I don't have any pictures of this install, but just know that it involves unbolting the following:
-engine mounts
-steering rack
-both control arms
-swaybar
-crossmember itself
-U-joint to the steering wheel
Here's what it looks like.
Next thing to do is tap the valve cover for the turbo's oil drain. I used the 90 degree fitting, drilled a hole, then screwed it in with teflon tape. A rubber stopper went in the hose end so it wouldn't leak while I waited for other parts to come in. I used a 3/4" drill bit, then just screwed the fitting in.
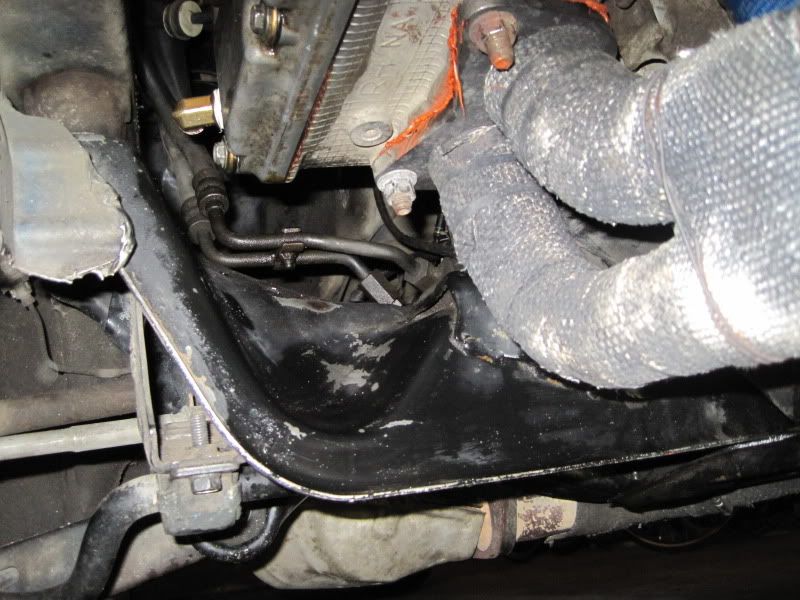
The next step is really only necessary if you have an 02-05 intercooler. The 06-07 TMIC's are much shorter an don't have fitment issues. Basically, this step involves grinding away part of the lip on the firewall, under the brake lines. I don't think there;s anything really structural, and grinding away a bit won't do much to weaken the unibody.
Before, the firewall area looks like this:
And after a bunch of cutting, grinding, and test fitting, it will look something like this:

Make sure and spray on some clearcoat or something to keep the bare metal from rusting.
You'll also need to shorten you clutch reservoir. This is easy, just take it off, cut it, deburr, then reinstall.
Or, you can get a sweet JDM offset reservoir from a JDM BC Legacy. They're kinda hard to find:

You will most likely need to trim off the throttle body and outlet of the intercooler for more clearance. Just trim 1/4" off each piece, but mak sure you have enough metal to get a coupler on there.
------------------------------------------------------------------------------------------------------
Main install:
If you have access to a lift, or better yet, a pit, use it. Otherwise just put the car on jack stands.
The most time consuming thing to do is re-routing the PCV, breather, and IACV lines. I don't have pictures of this, because I'm sure there's a better way to do it, but you'll need to get a T as close to the crankcase vent as possible, and make it very low, and flush to the rest of the stuff under the IACV. I made one line go under the passenger side intake manifold, looping up behind the power steering reservoir, then another under the throttle body, then around to T in with the breathers lines.
I ran the breather lines on top of the engine, and used the stock T connector to combine them.
For the IACV, I ran a short bit of hose to a 90" 3/4" barb elbow, which runs up to a fitting on the intake tube.
Here's what my hoses look like, as an idea.
Now, you can jack up the engine a bit, bend the power steering lines out of the way a bit, and install the manifold, using new gaskets. If you can, get ahold of one of the turbo suspending mounts, and bolt it on:
A 90 degree elbow is REQUIRED for you oil drain line; if you don't install one below the drain on the turbo, it will kink and you'll blow the seals of the turbo.
Then, wrap the line with aluminum tape, or something to keep the line safe from the heat of the up-pipe. Run the line like so:
Don't forget to clamp it and stuff.
Next up to tackle: the coolant lines. I tapped into the heater core lines, using the 2 3/4" to 1/2" tees.
On the turbo, you need to cut the feed line in the middle so you can flip the top line back so it aims toward the firewall.
The, run the 1/2" line around.
Now, install your oil-feed lines. You can either use high-temp thread sealant for the fittings, or teflon tape. Either will work.
There's a number of different ways to arrange your 1/8" brass tee, but I made mine like this, so it won't hit the alternator.

Next, bolt up the downpipe of your choice.
Here's what you'll have on the intake side:
You'll need to trim the 2.25-2.5" intake coupler to let it clear the intake manifold. The 2.5" intake tube can also be cut to fit at this point. Drill the holes for the brass fittings, and install them as well.
As you can see, the stock WRX y-pipe won't line up, so we have to extend it to meet the turbo. I wouldn't advise cutting the stock y-pipe and trying to make it seal with a coupler. Just get an aftermarket y-pipe, trust me.
On the pressure side, you have to extend the y-pipe downward to meet the turbo outlet, using the extra 2" coupler and piece of pipe.
You should have something like this at this point.
Here's everything else mocked up:
For your BOV/BPV, just bolt it on. My SSQV flange was a close fit:
At this point, you're basically done! It's just a matter of clamping everything in place, and testing it out! I know I missed some important information, so I'll try and add it in as I remember. Don't forget to get an exhaust made/bolted on.
Here's my finished product:
Happy boosting.
Update #1:
I swapped out my IACV for an EJ22t version, which has a nifty 90 degree inlet that makes it way easier to route. You phase II RS guys don't have to worry about this.

I found that the EJ22t has a one-way valve in the little plate behind it that prevents boost from leaking. It swaps right over to the 25D manifold.
Update #2
I really hated how the intercooler sits really far back, and has to be all crooked due to the EGR valve.
So, I did a couple modifications to make it sit nicer.
First was chopping down the throttle body. I never use cruise control, so I just took all the pieces off the threaded rods (in order), the ran a die to create new threads, cut off the excess of the rods with a grinder, and put everything back together.
On the throttle body itself, I just lopped off about an ~1.5 inches, then cut/dremeled out around the chunk of metal that holds the throttle plate arms.
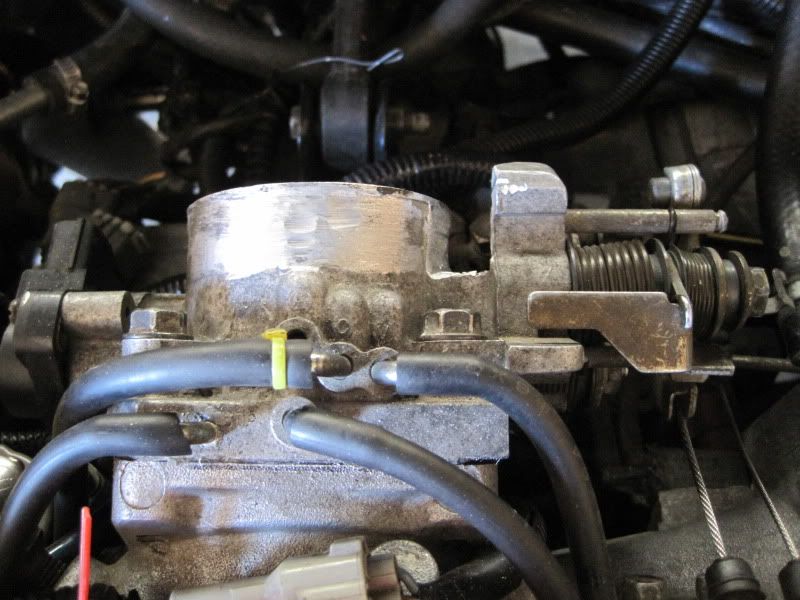
Comparison with stock throttle body to show differences: